FAT Paint’d Pumpkin
October 20, 2017

If your Instagram feed is anything like ours, you’re likely scrolling through an influx of FAT Paint’d pumpkin pictures these days. And that can only mean one thing: Halloween is right around the corner!!
Painting pumpkins isn’t a new trend. Parents have been doing it for years, particularly with children too young to safely carve Jack-o-lanterns. That said, some DIYers simply prefer to use paint to transform a traditional gourd into stunning a work of art.
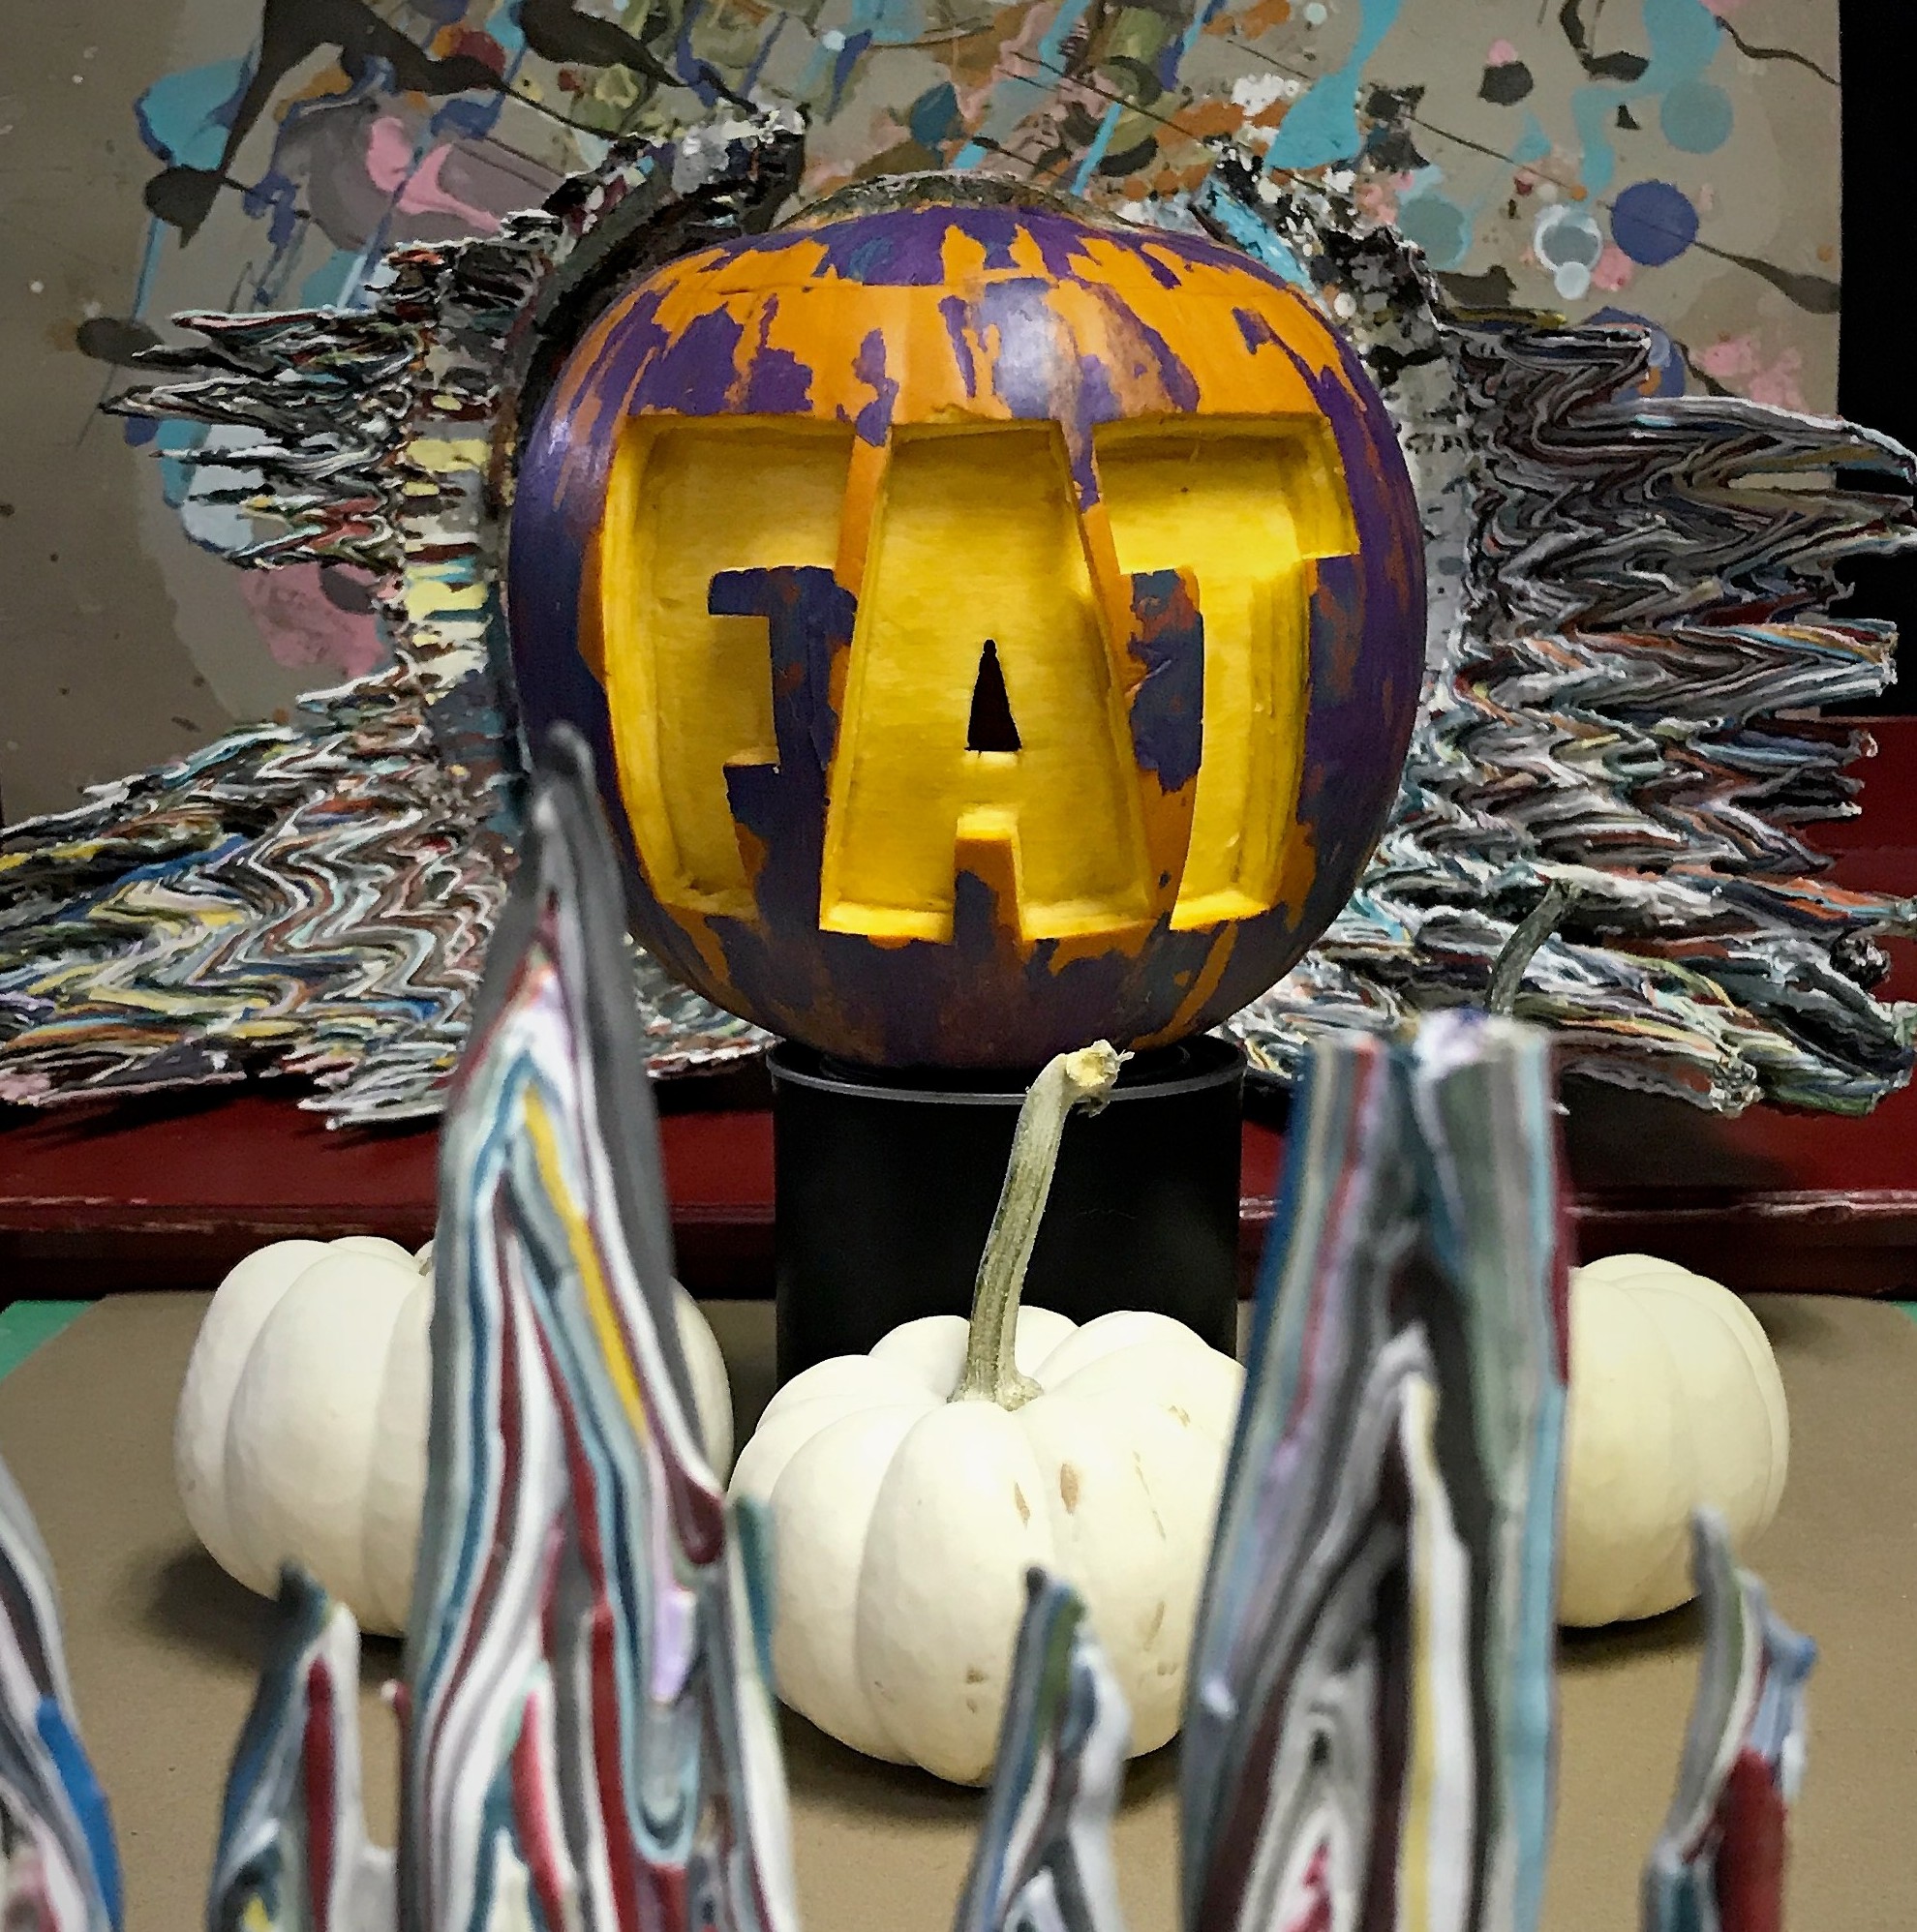
We decided to take pumpkin painting to a new level—playing with a technique many of you, our FAT fans, use FAT Paint specifically to create: the shabby-chic look.
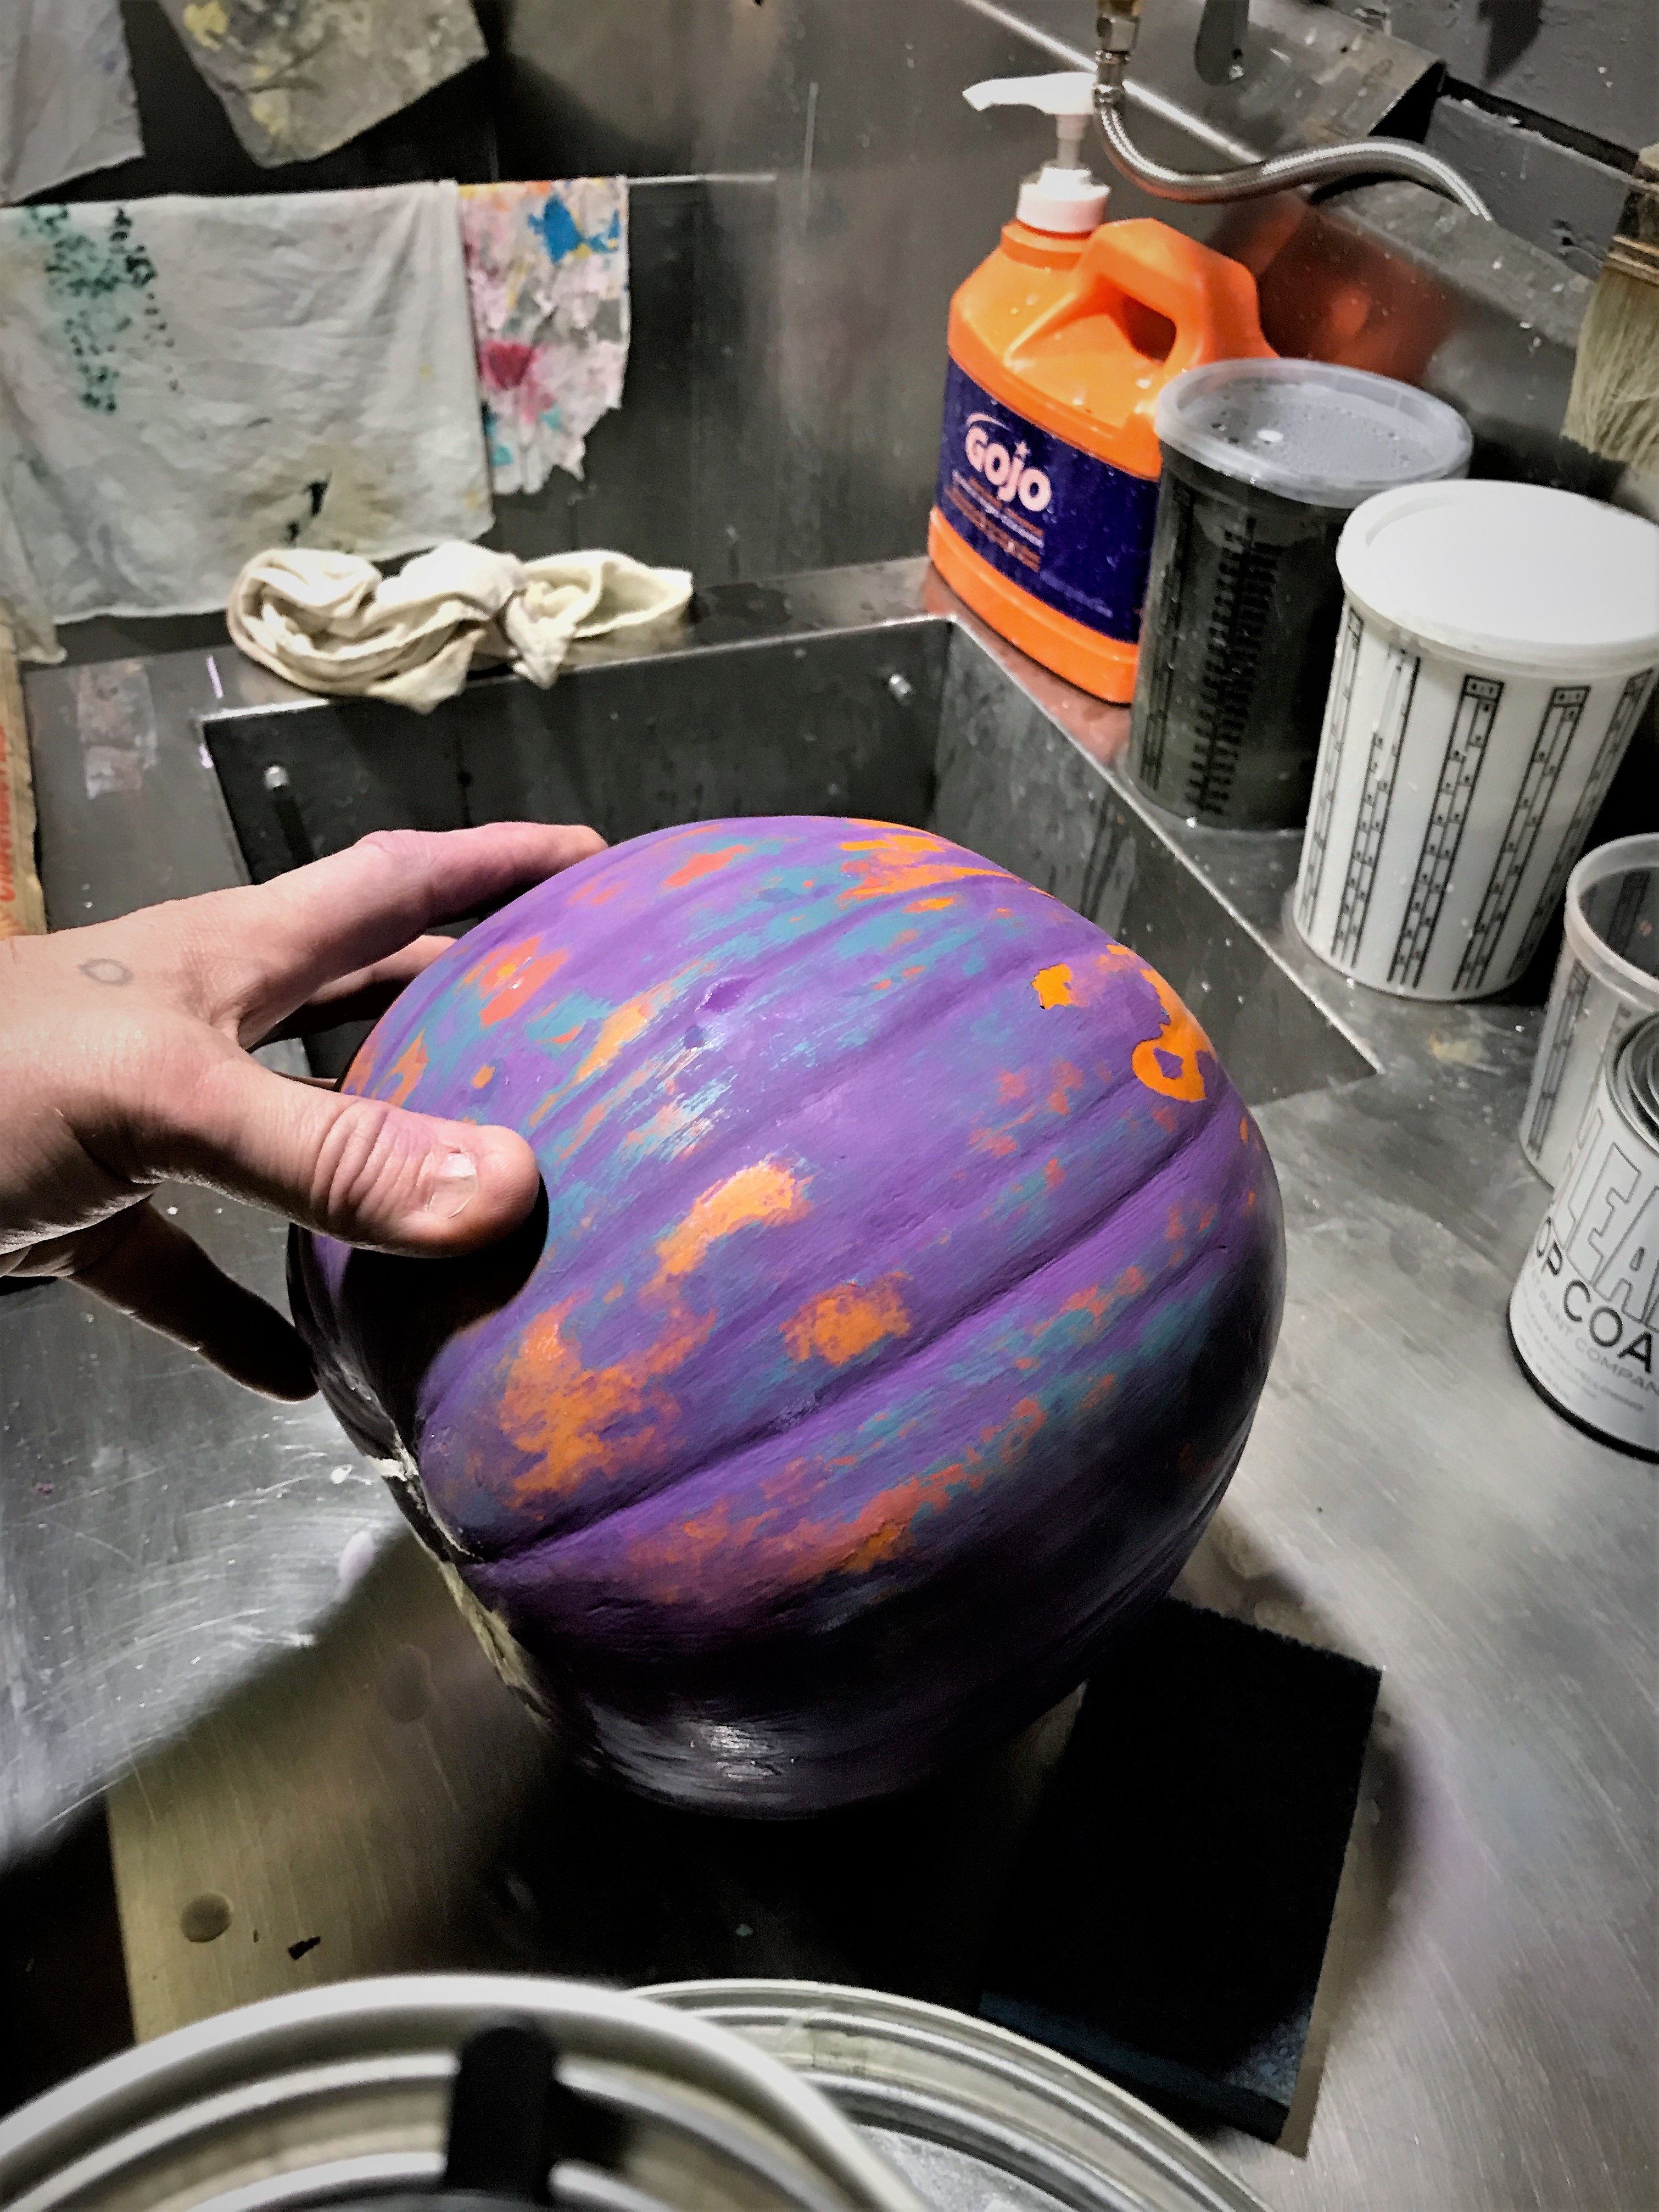
Our distressed, multi-layered pumpkin looks super cool. And it was really easy to create.
Step 1: Clean the pumpkin
If you picked your gourd fresh out of the patch, or even if you bought it at the grocery store, you’ll want to make sure to wipe it clean. Mud and muck will prevent our chalk-style paint from adhering to the pumpkin’s skin, so make sure to give it a quick wash before you roll up your sleeves.
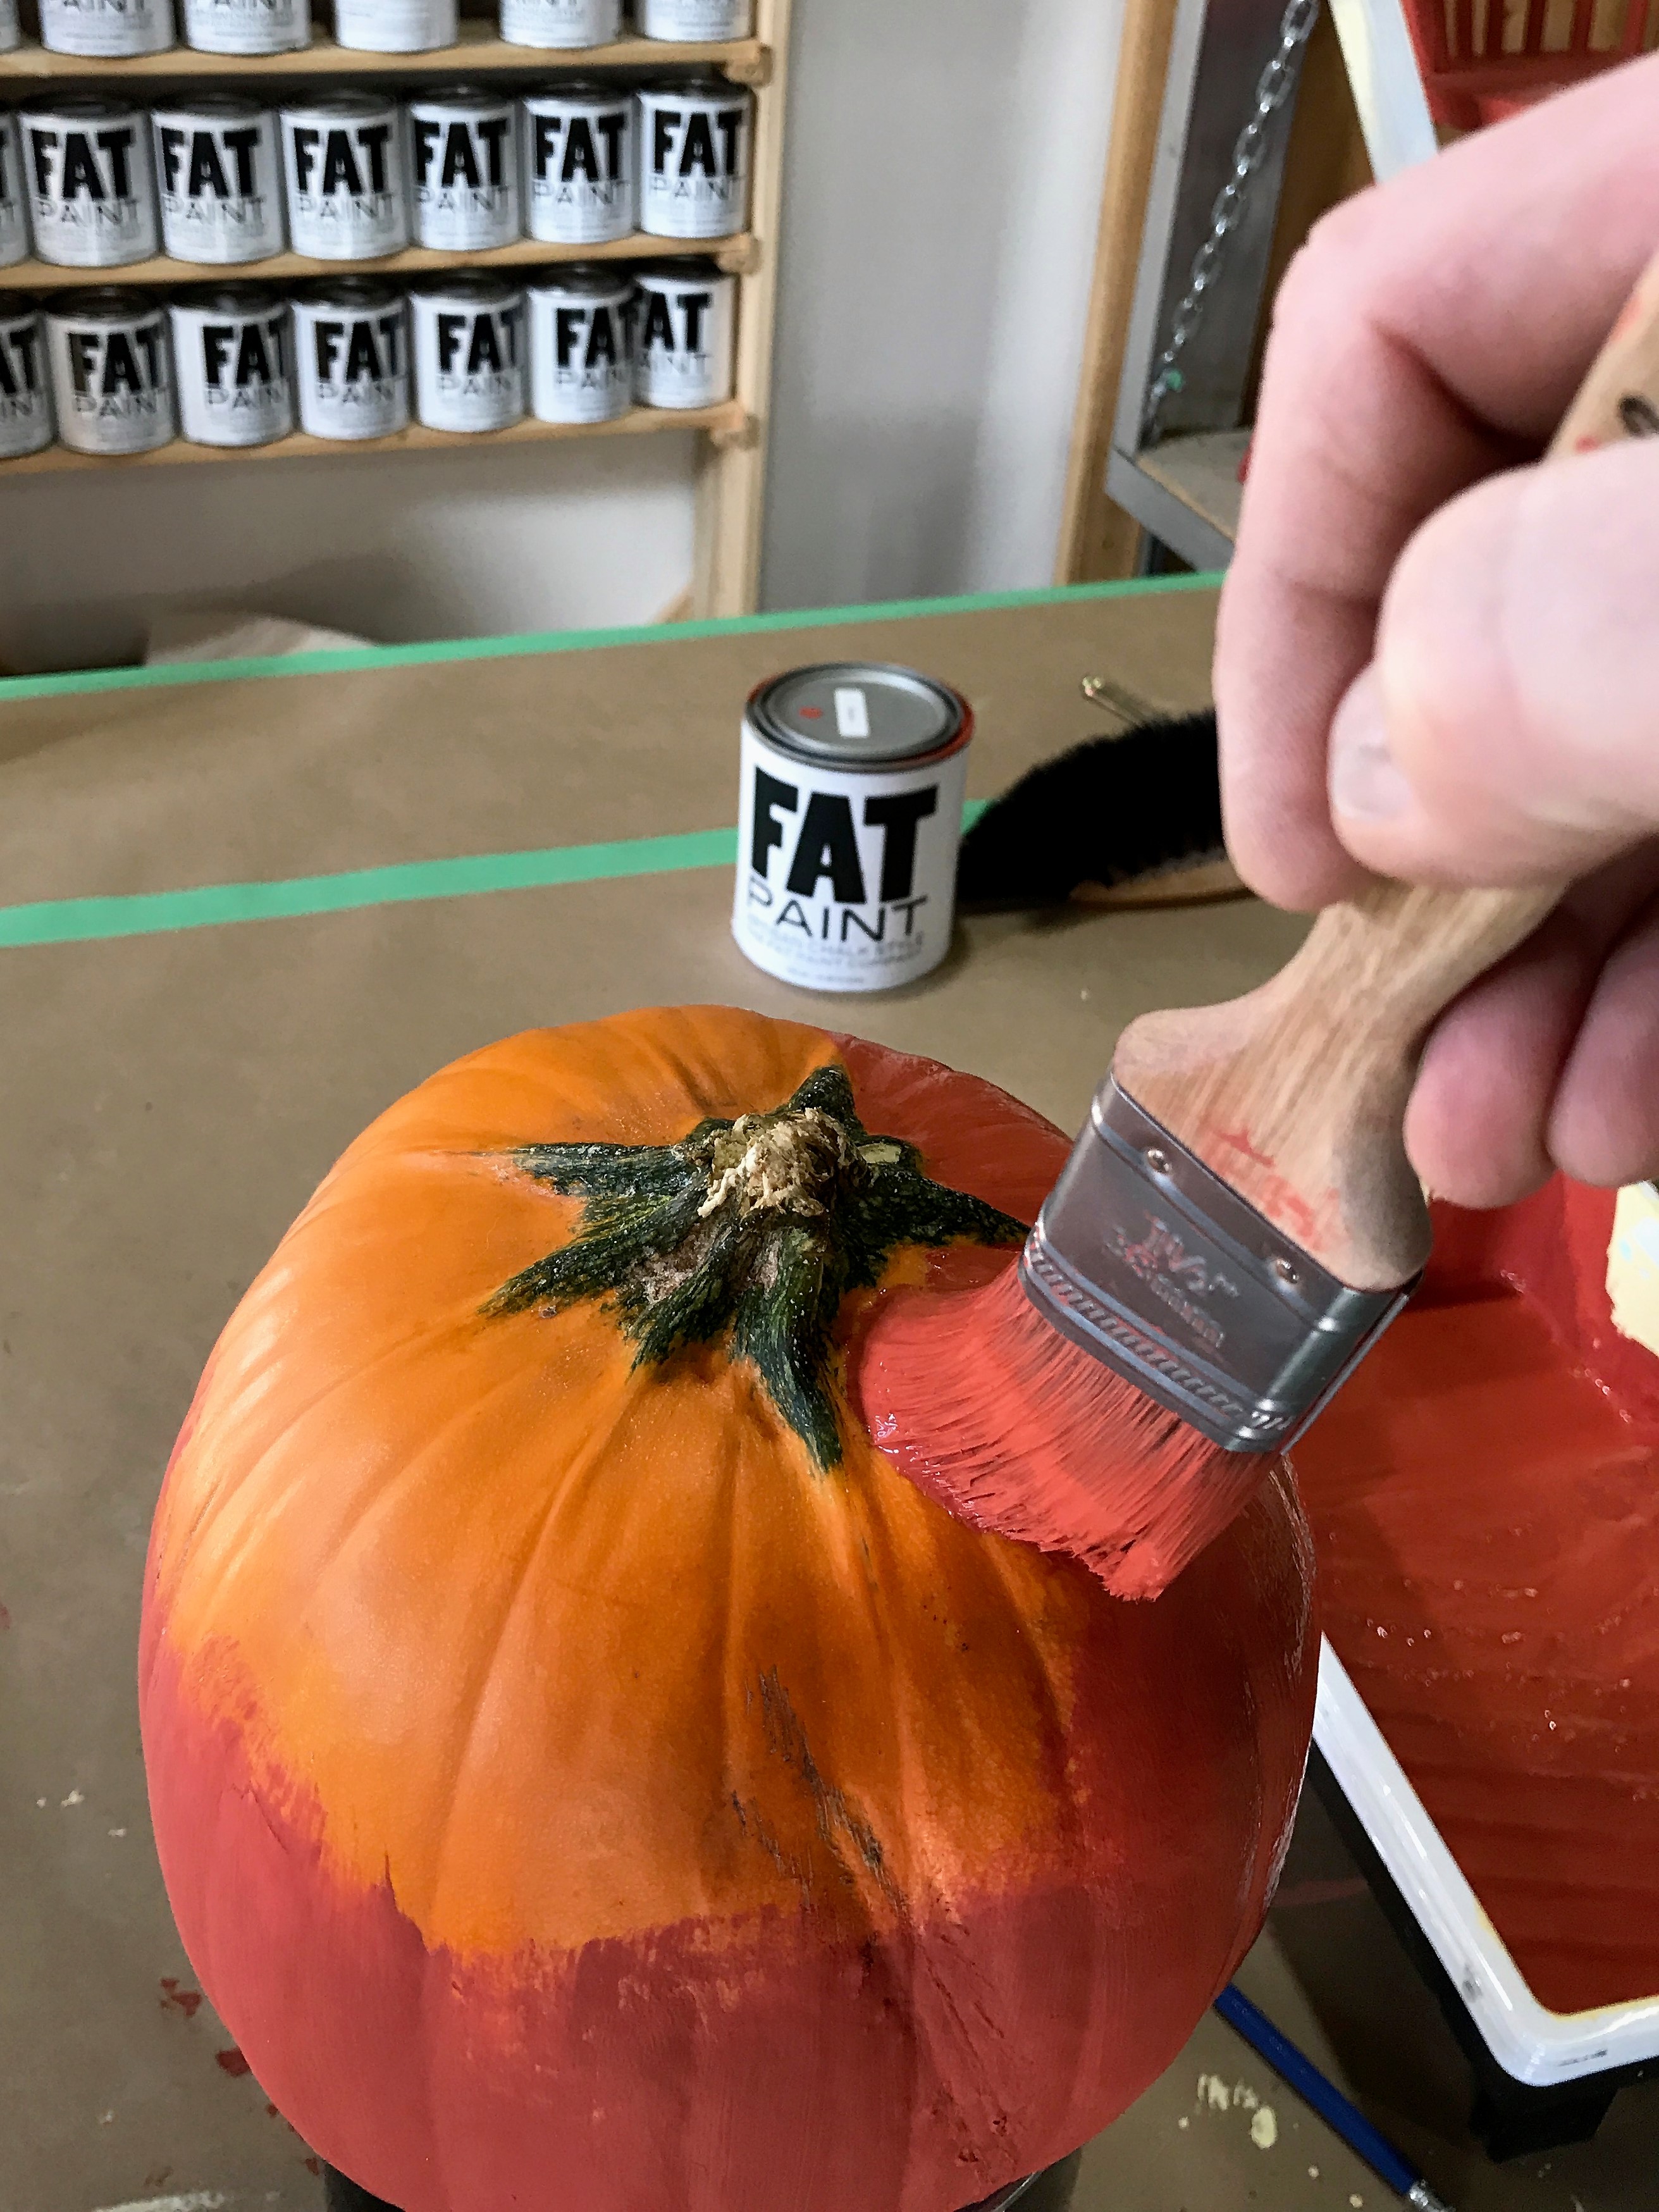
Step 2: Pick your colours
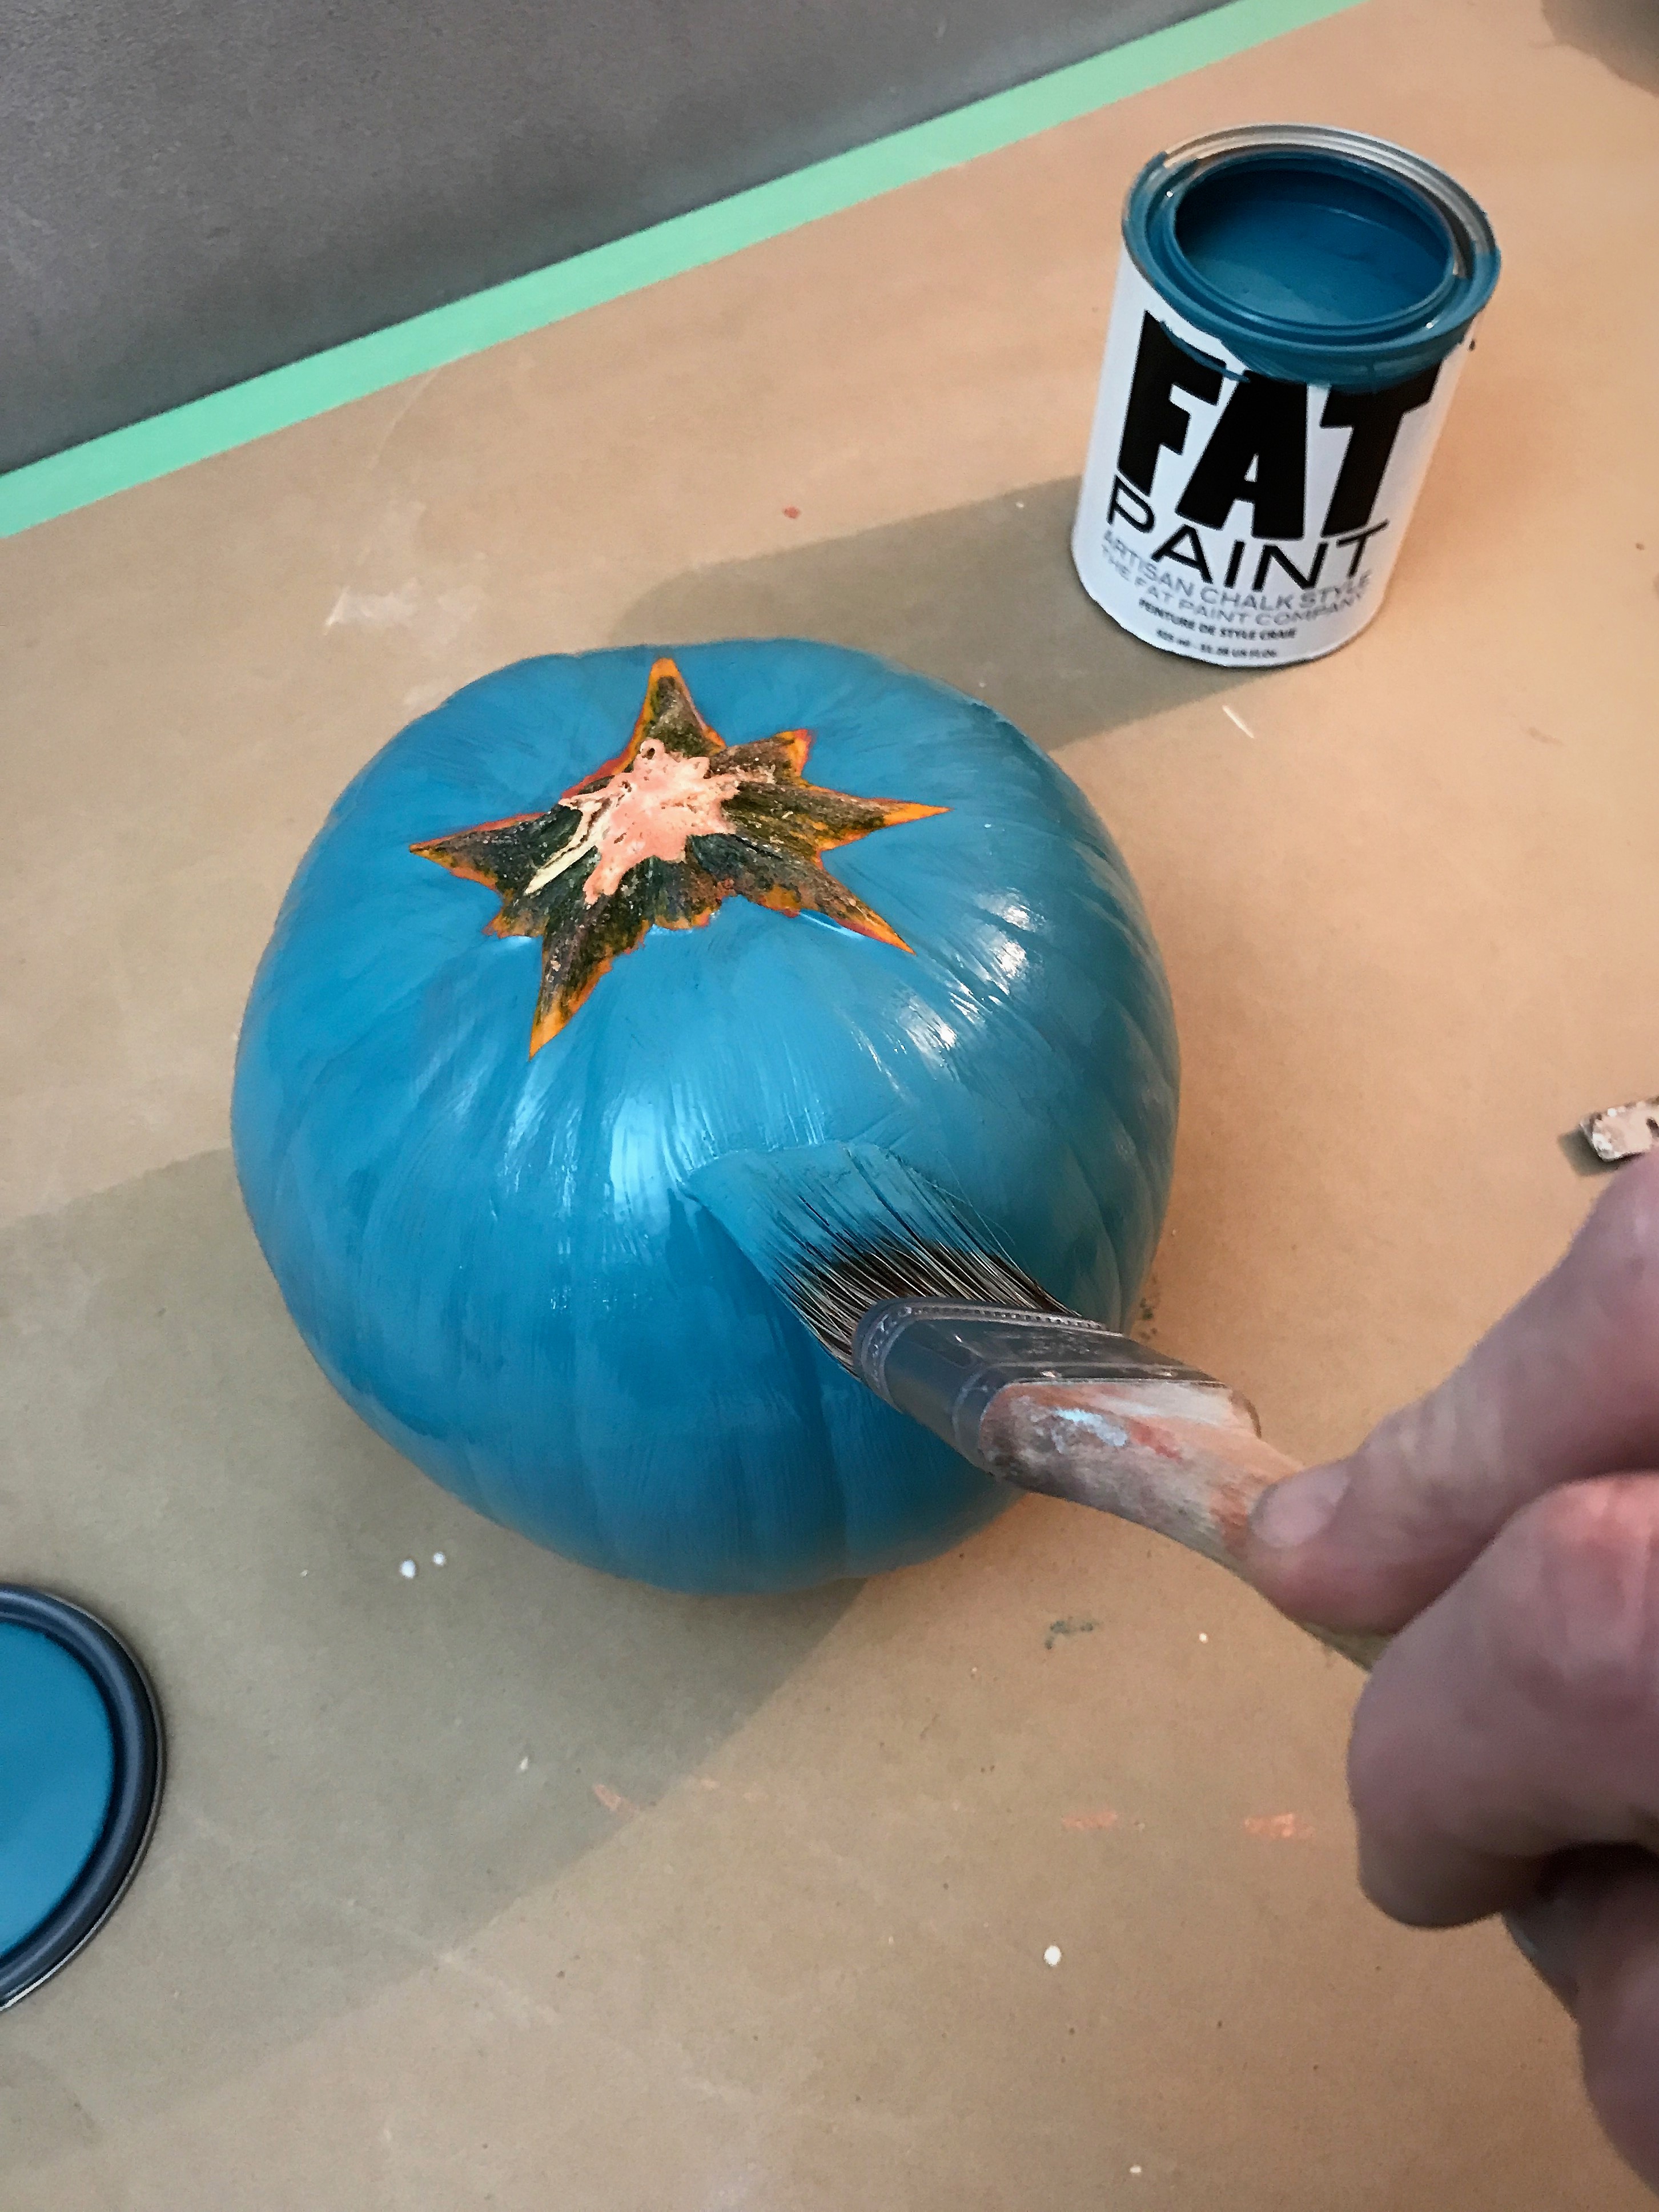
Whether you want a natural look, a tasteful palette to complement your home decor or a super spooky colour scheme—make sure to pick two, three or four (or more) colours that will work with each other. And the pumpkin, too!
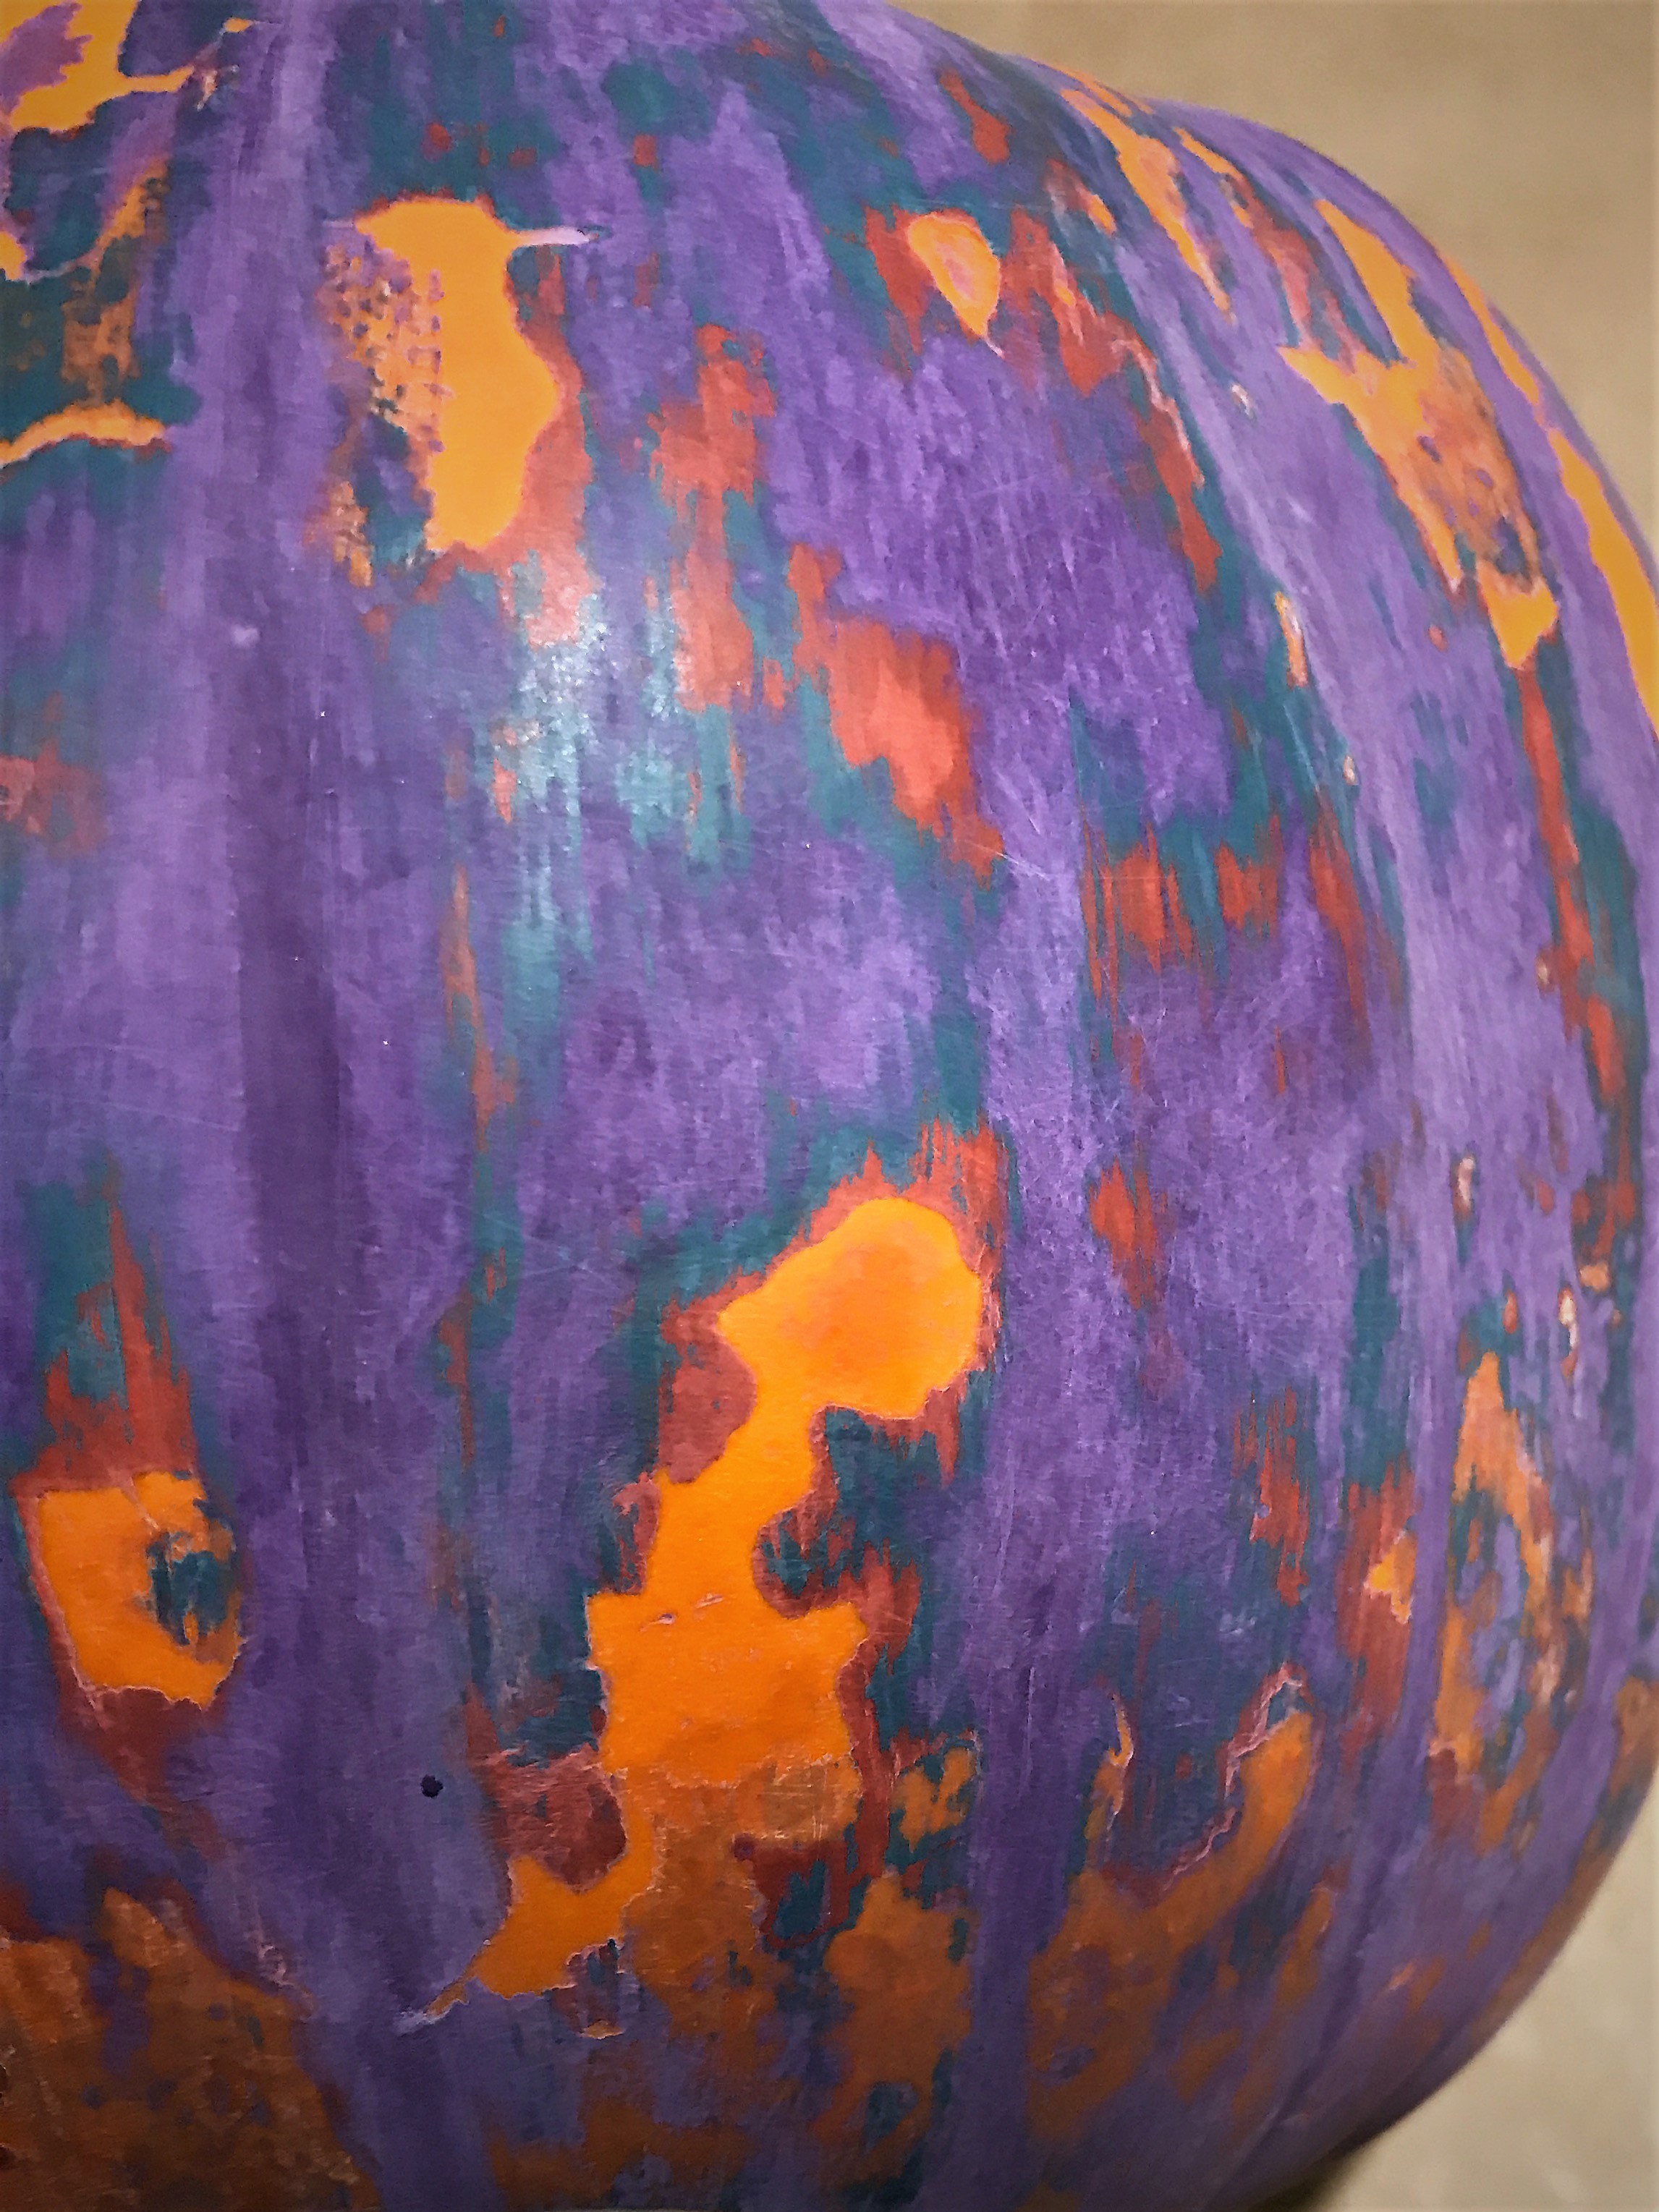
We went with Autumn, Peacock and Dharma, all from our FAT-tastic palette of FAT Paint, of course! They all play nicely off the orange of the pumpkin and look great next to each other. We also wanted to have a little bit of FAT fun—after all, that’s what we’re all about!
Step 3: FAT’n it up!
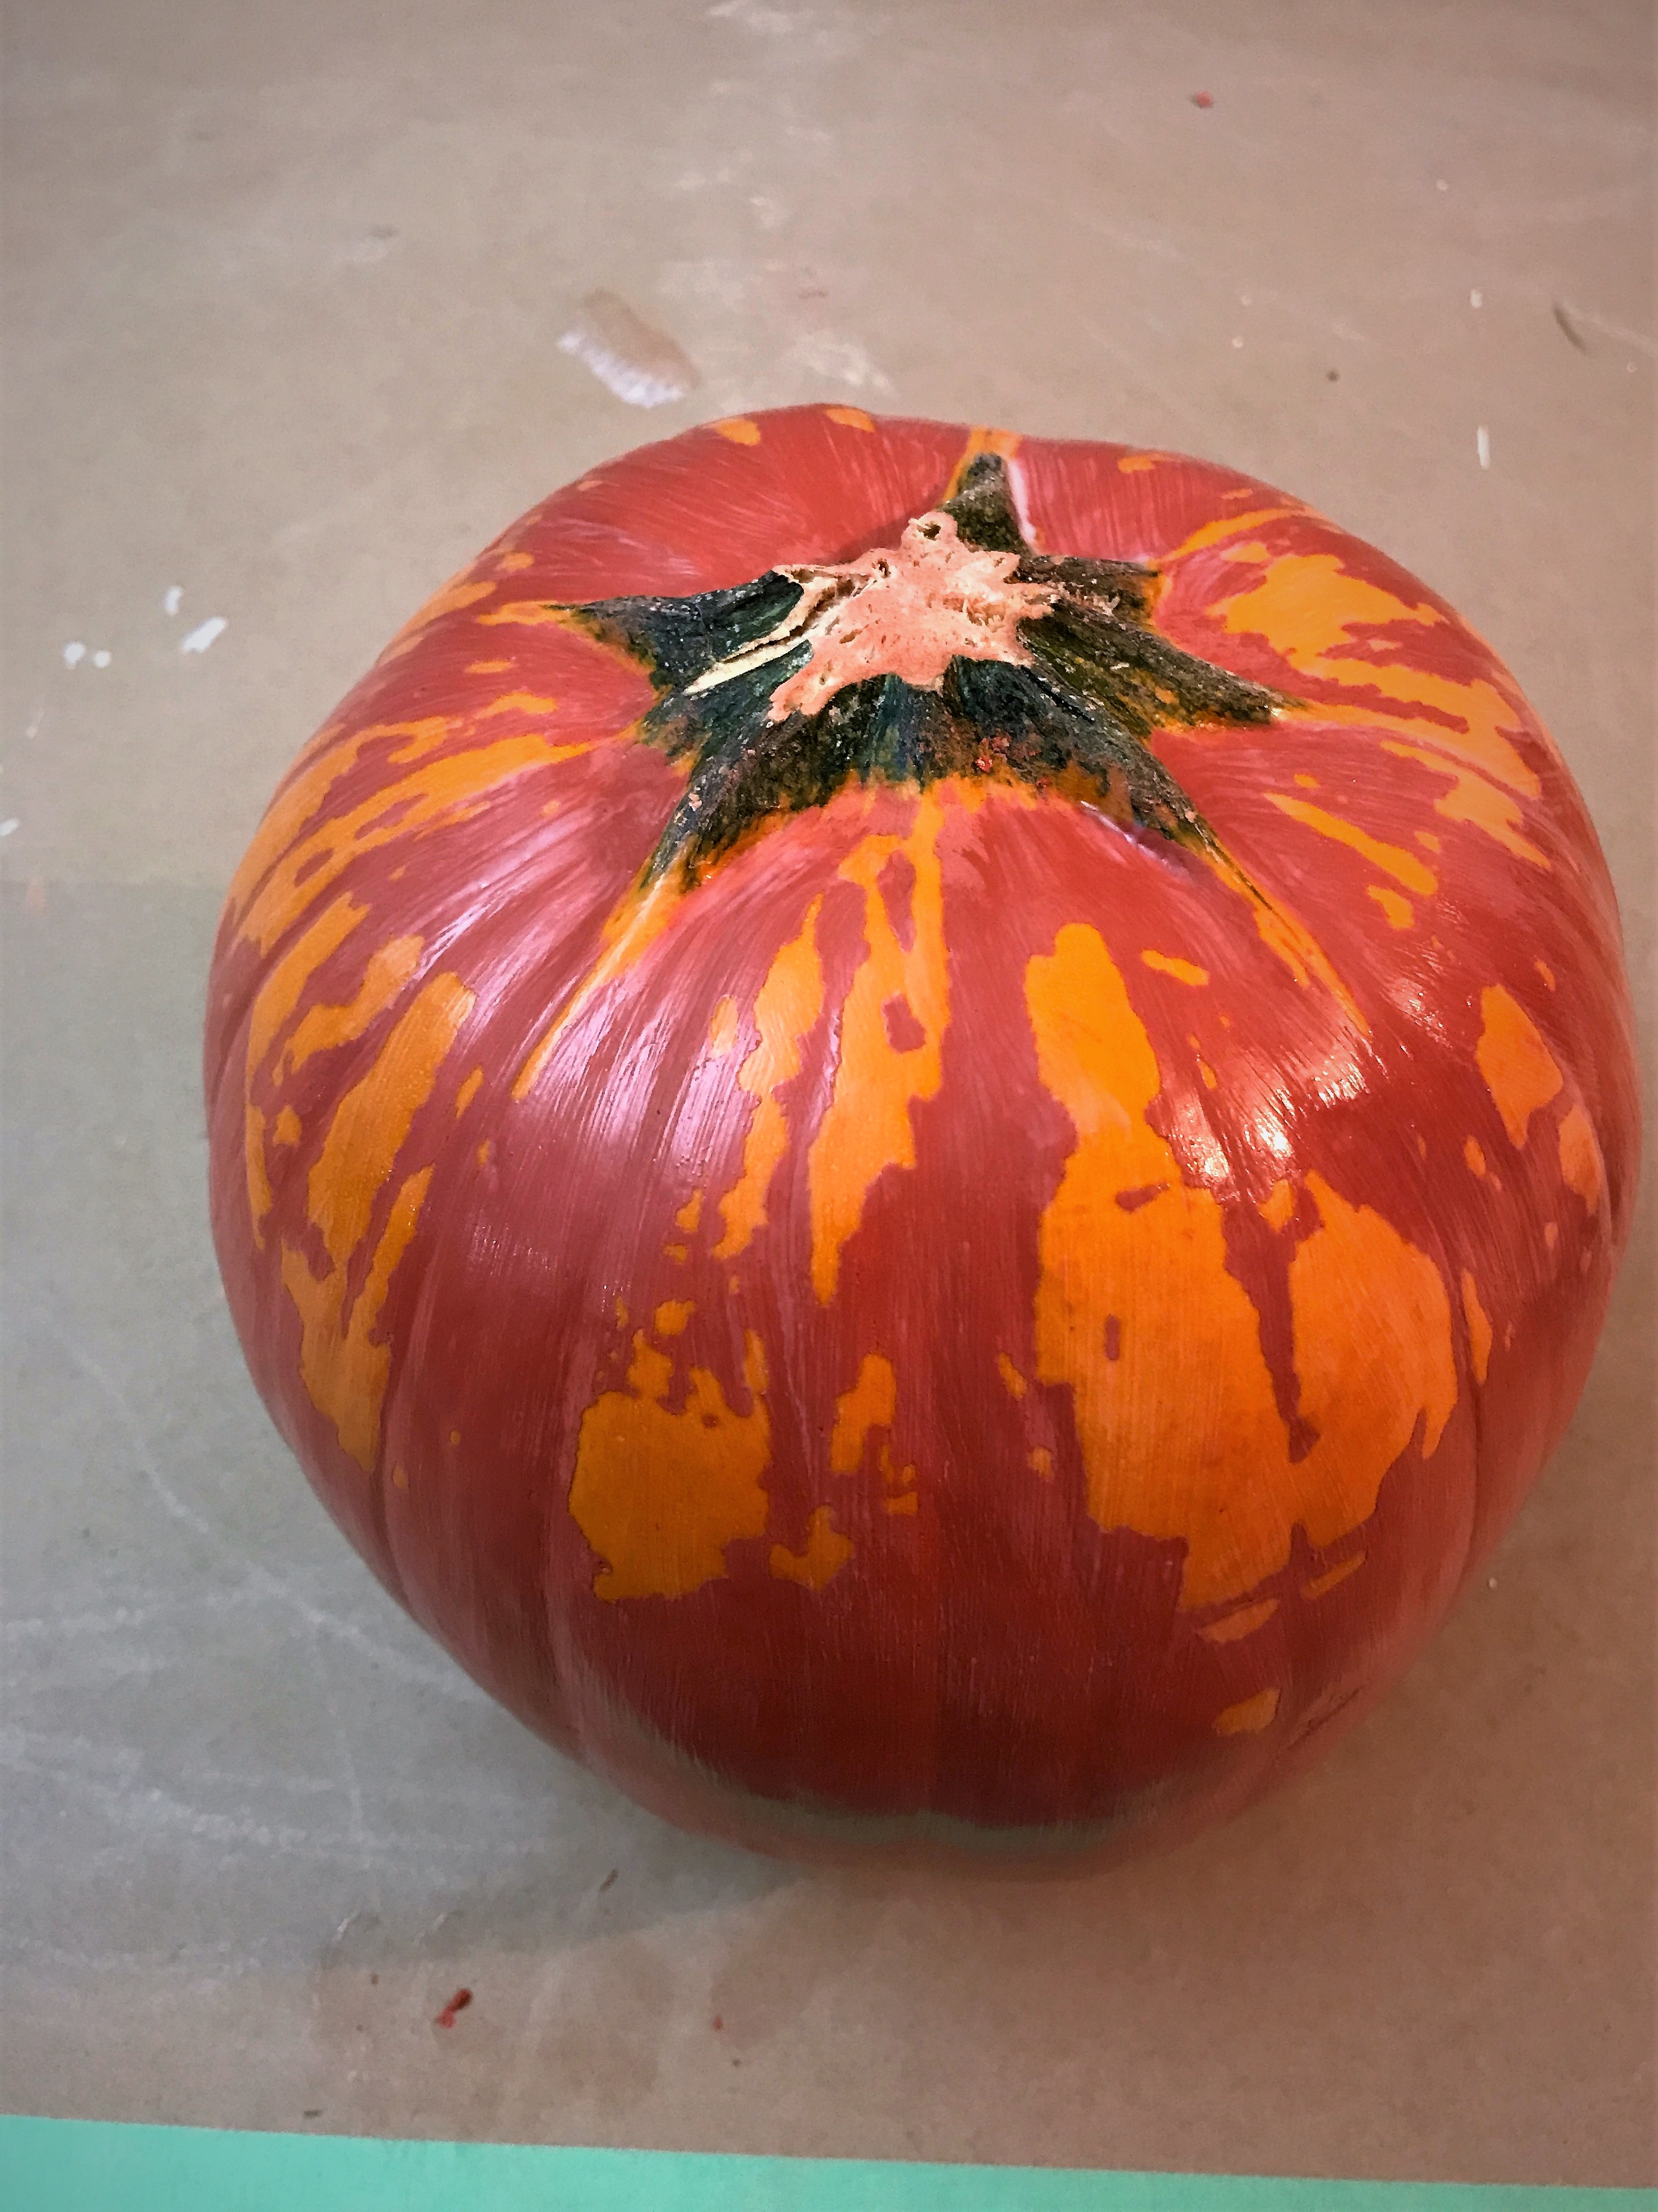
Start with your base layer of FAT Paint. We went with Autumn. You can do one or two coats, depending on the level of coverage you wish to achieve. Make sure to let the paint dry between coats. If you’re in a rush, a hair dryer will help to speed up the process.
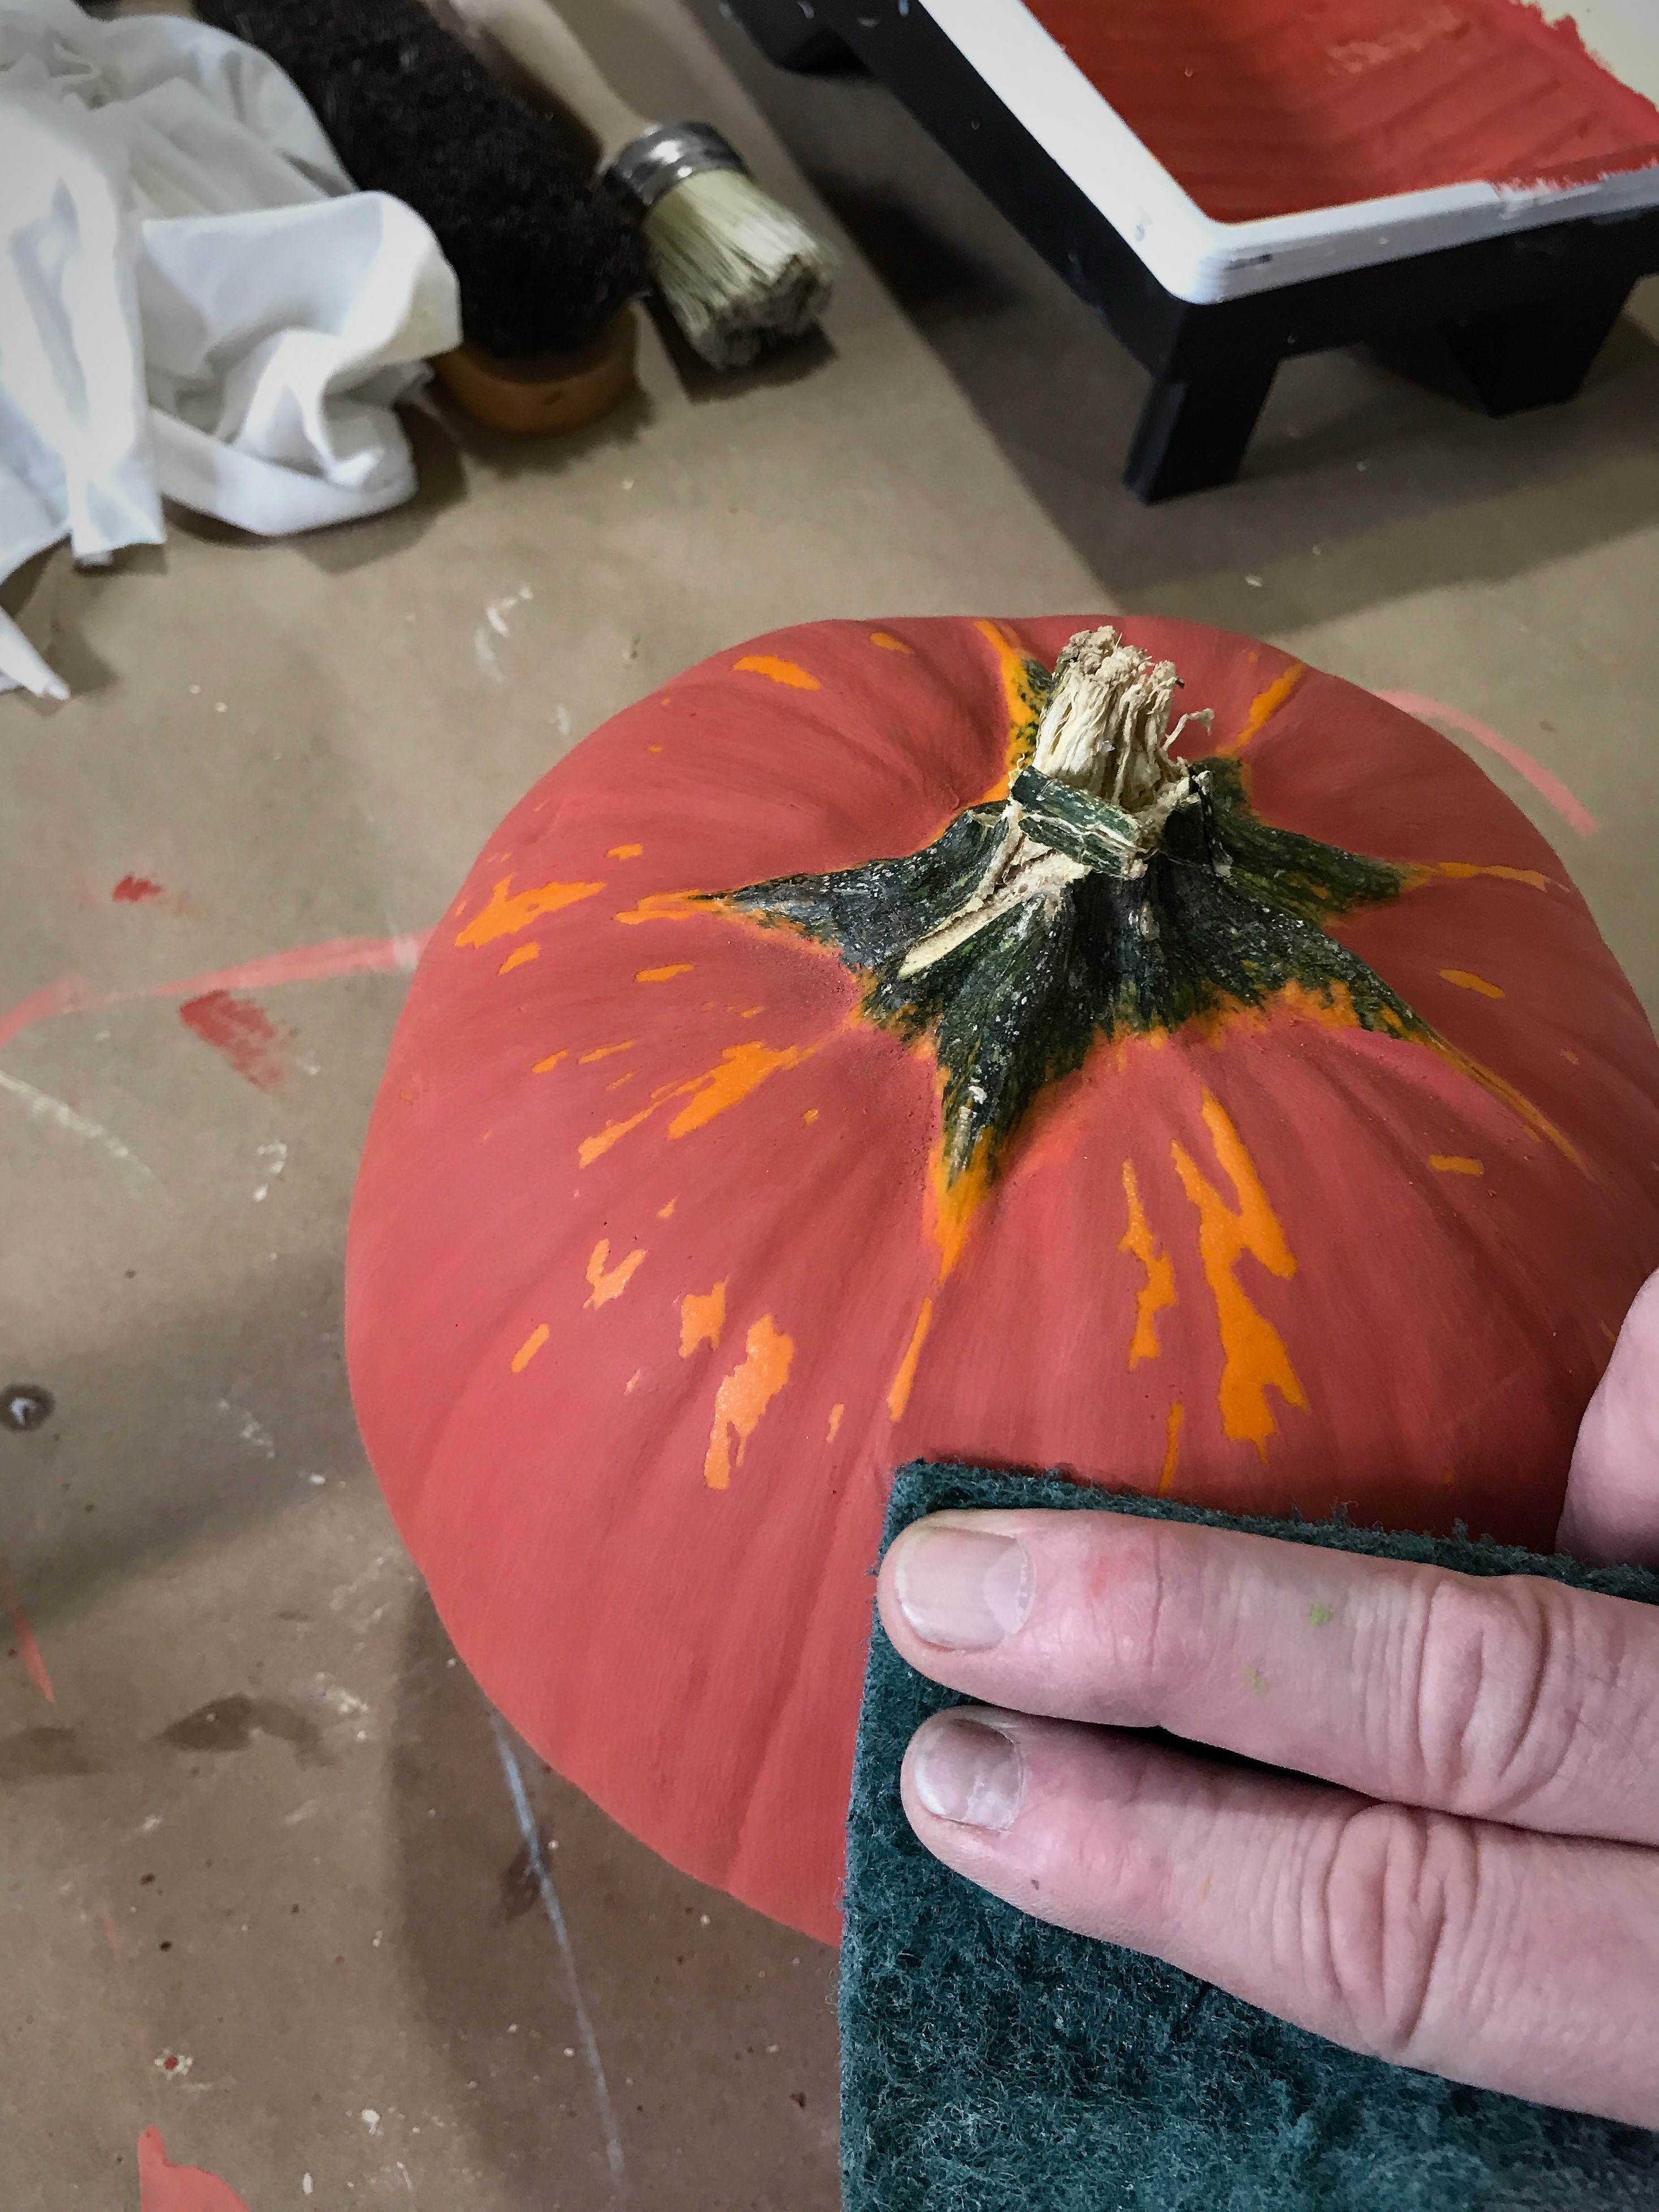
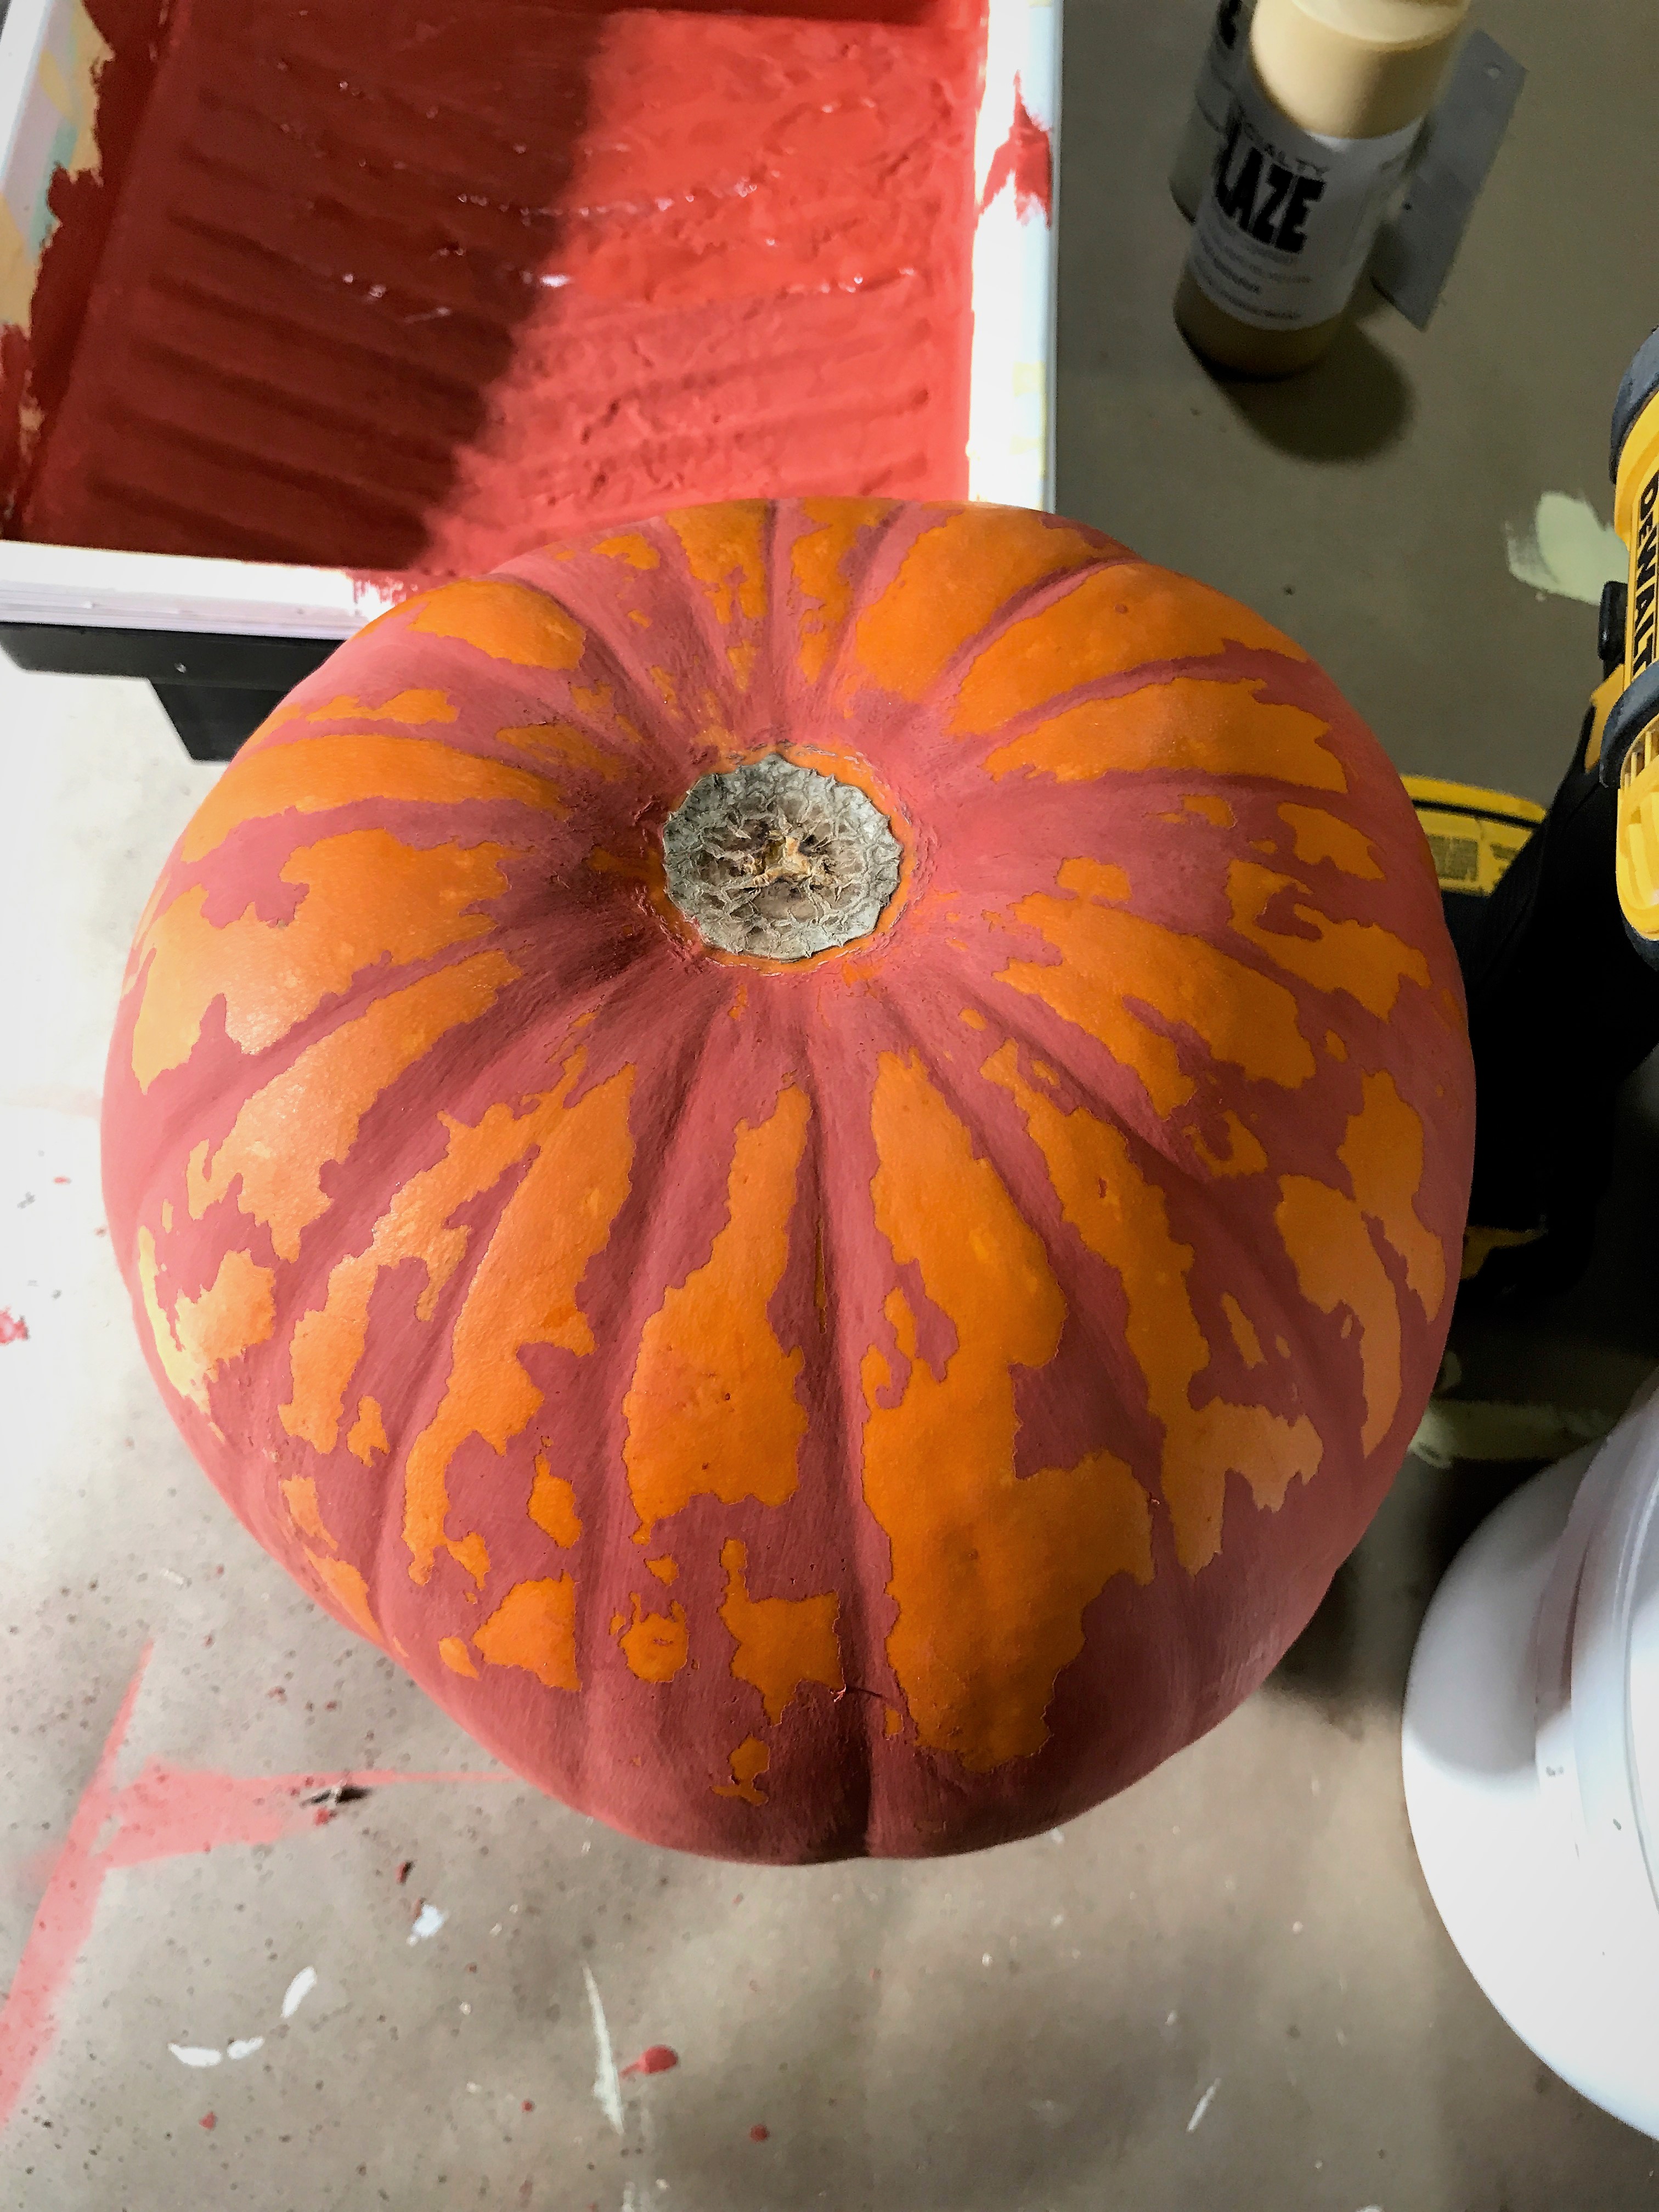
Step 4: The distressing
You have two options for creating the distressed look: a dry or wet sand.
For the dry sand process, use a fine to medium fine grit sandpaper—nothing too abrasive—pulling back on the paint with soft, light strokes. If you use anything more than that you’ll likely scrape off too much of the paint you just applied. You want to remove a little bit (obviously, as that’s what distressing is all about), but you’ll still want most of it to remain on the skin of the pumpkin.
We highly recommend the wet sand technique as you’ll have more control over the overall look of the distress. You’ll need a two-sided scrubbing sponge (scouring pad on one side and an absorbent sponge on the other) and a heavy duty scouring pad.
Wet—do not soak—the sponge and give the pumpkin a once-over so the surface is damp. Now, take the scouring pad and lightly move it along the surface, applying a little bit of pressure in the areas you want the reveal to occur. Then, take your damp sponge and wipe the surface clean, washing the paint from the pumpkin’s skin. Do this as many times as you wish until your desired look is achieved.
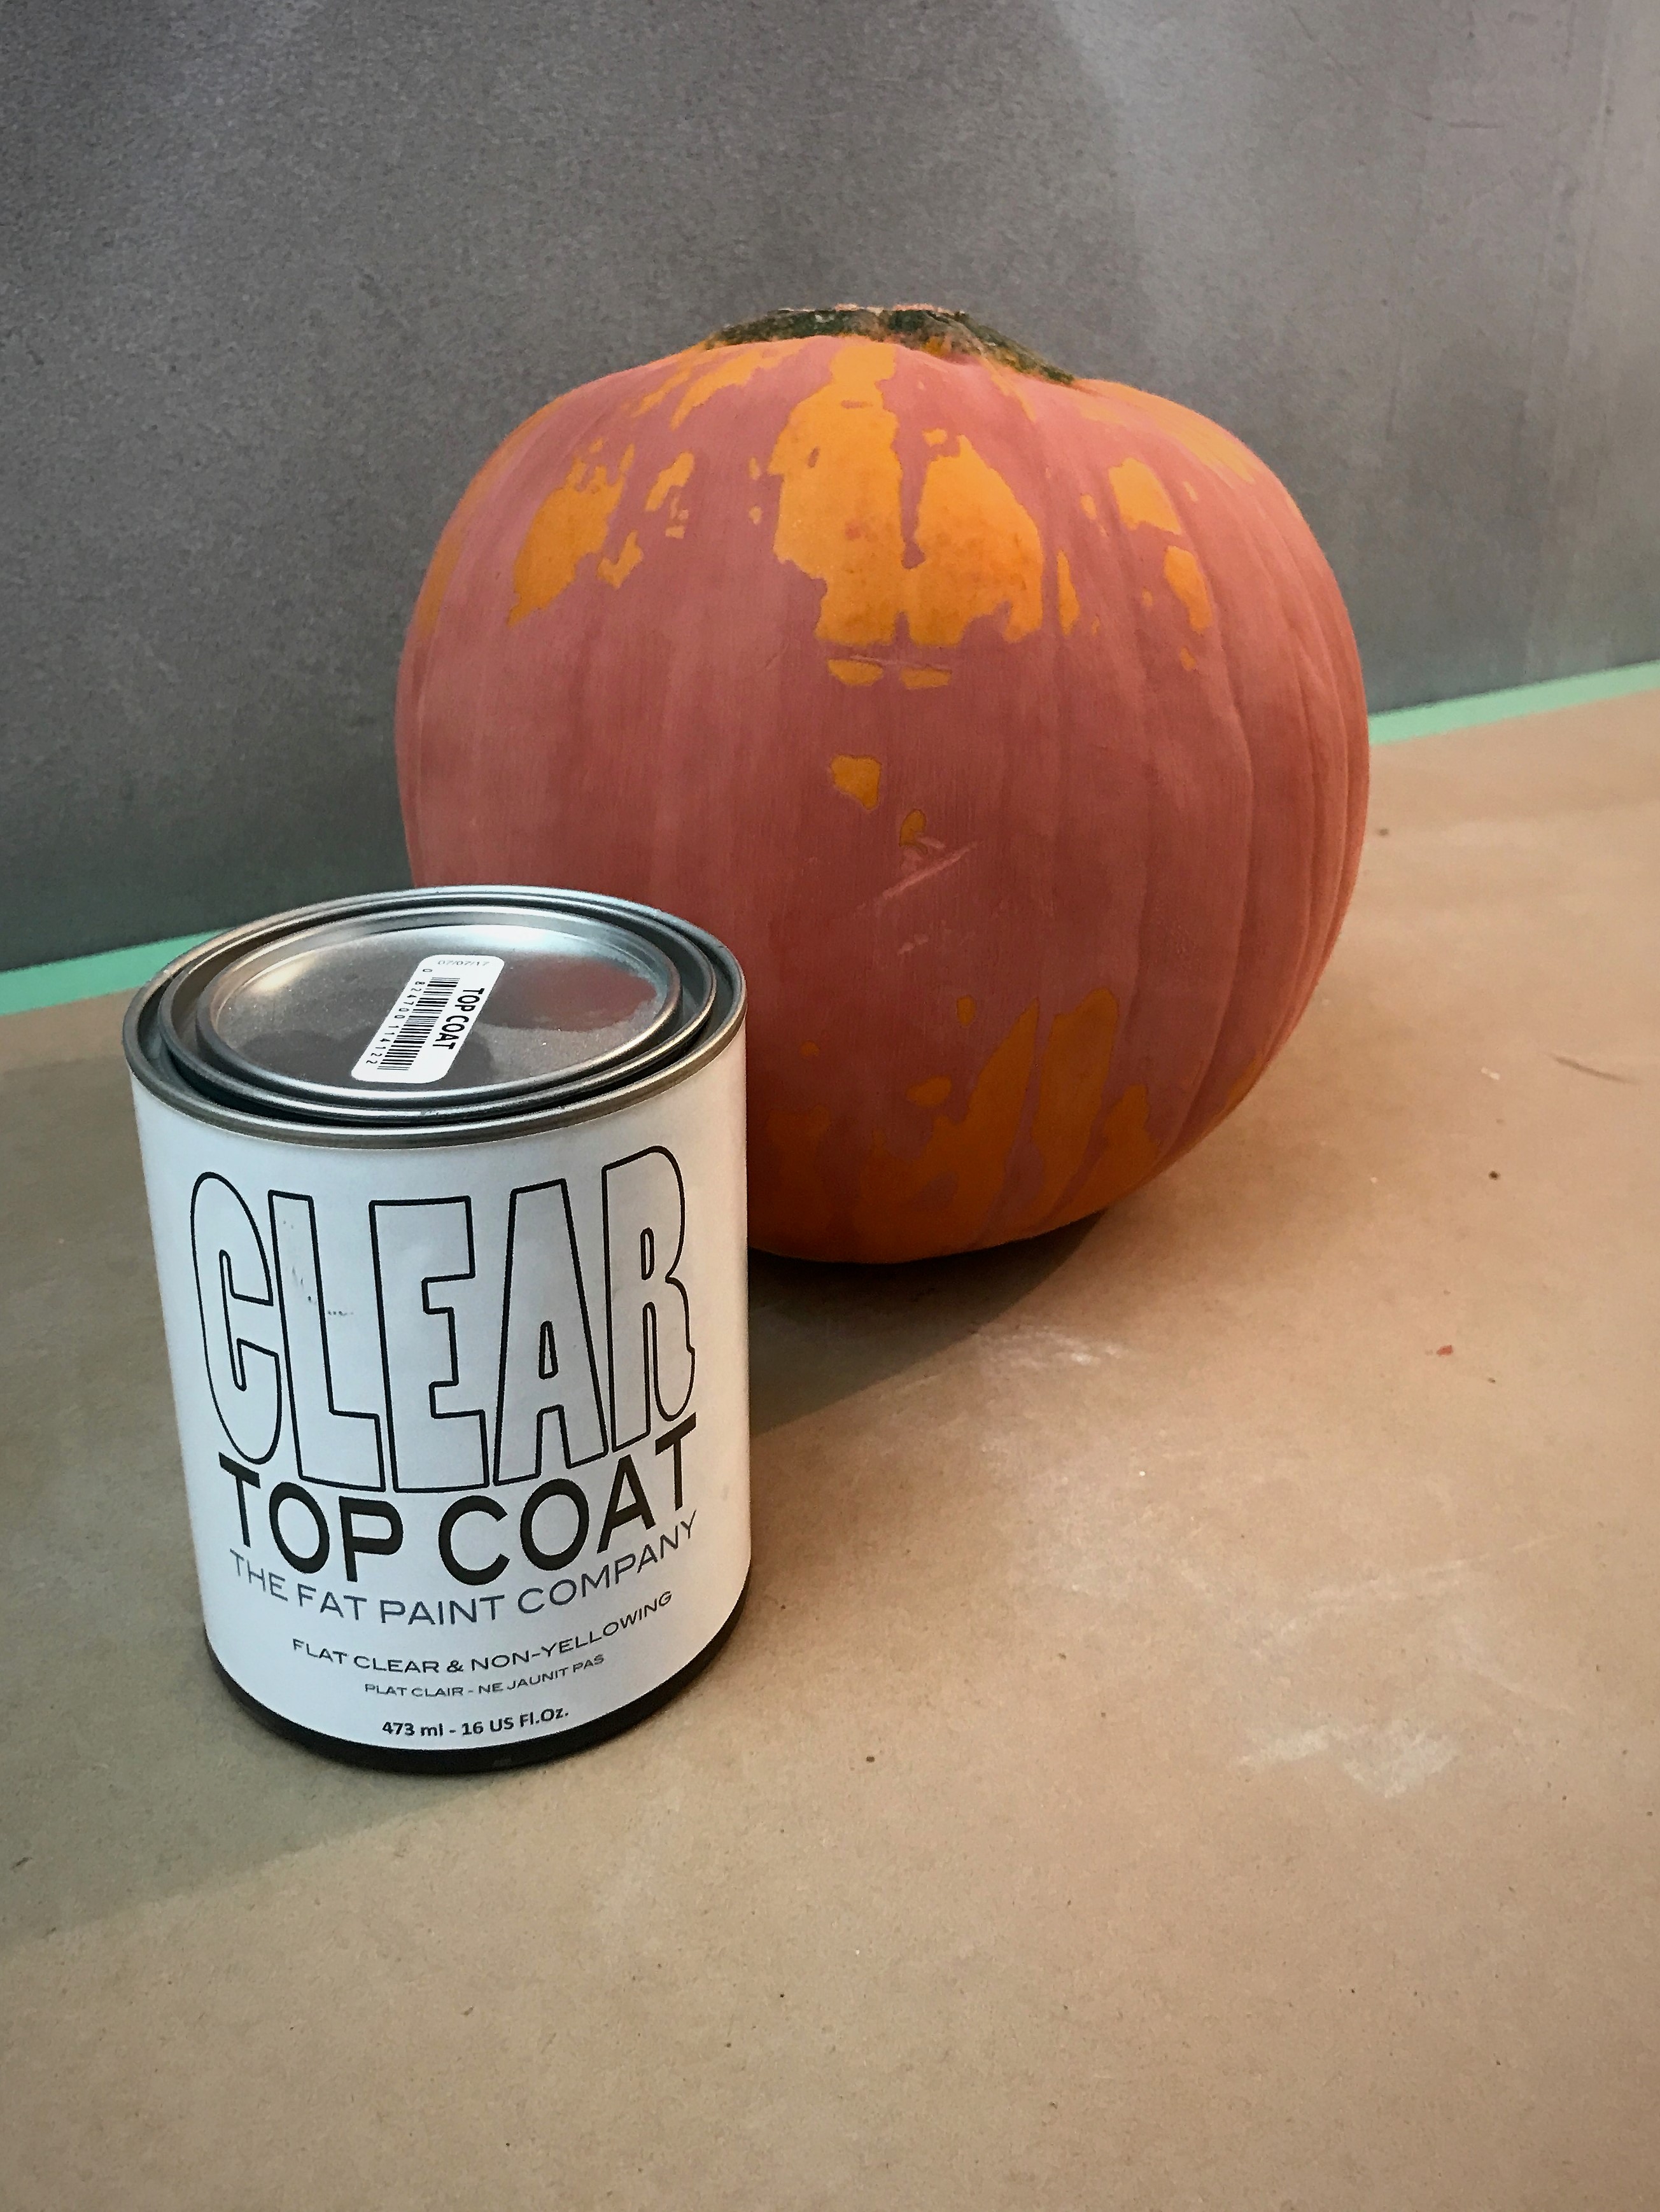
Step 5: Apply a layer of CLEAR Top Coat
Let the pumpkin dry, then apply a coat of FAT Paint’s CLEAR Top Coat, our water-based sealant. This step is necessary as you want to seal FAT Paint into the pumpkin’s surface, especially if you are doing numerous layers.
Repeat Steps 3, 4 and 5 for each layer of colour you apply

One note: Instead of using CLEAR Top Coat to seal in the final layer of paint, you can apply some of our FAT Wax. This will create a beautiful, soft and supple finish, which will feel more natural than the top coat, but that’s purely a personal preference.
Viola! That’s it!
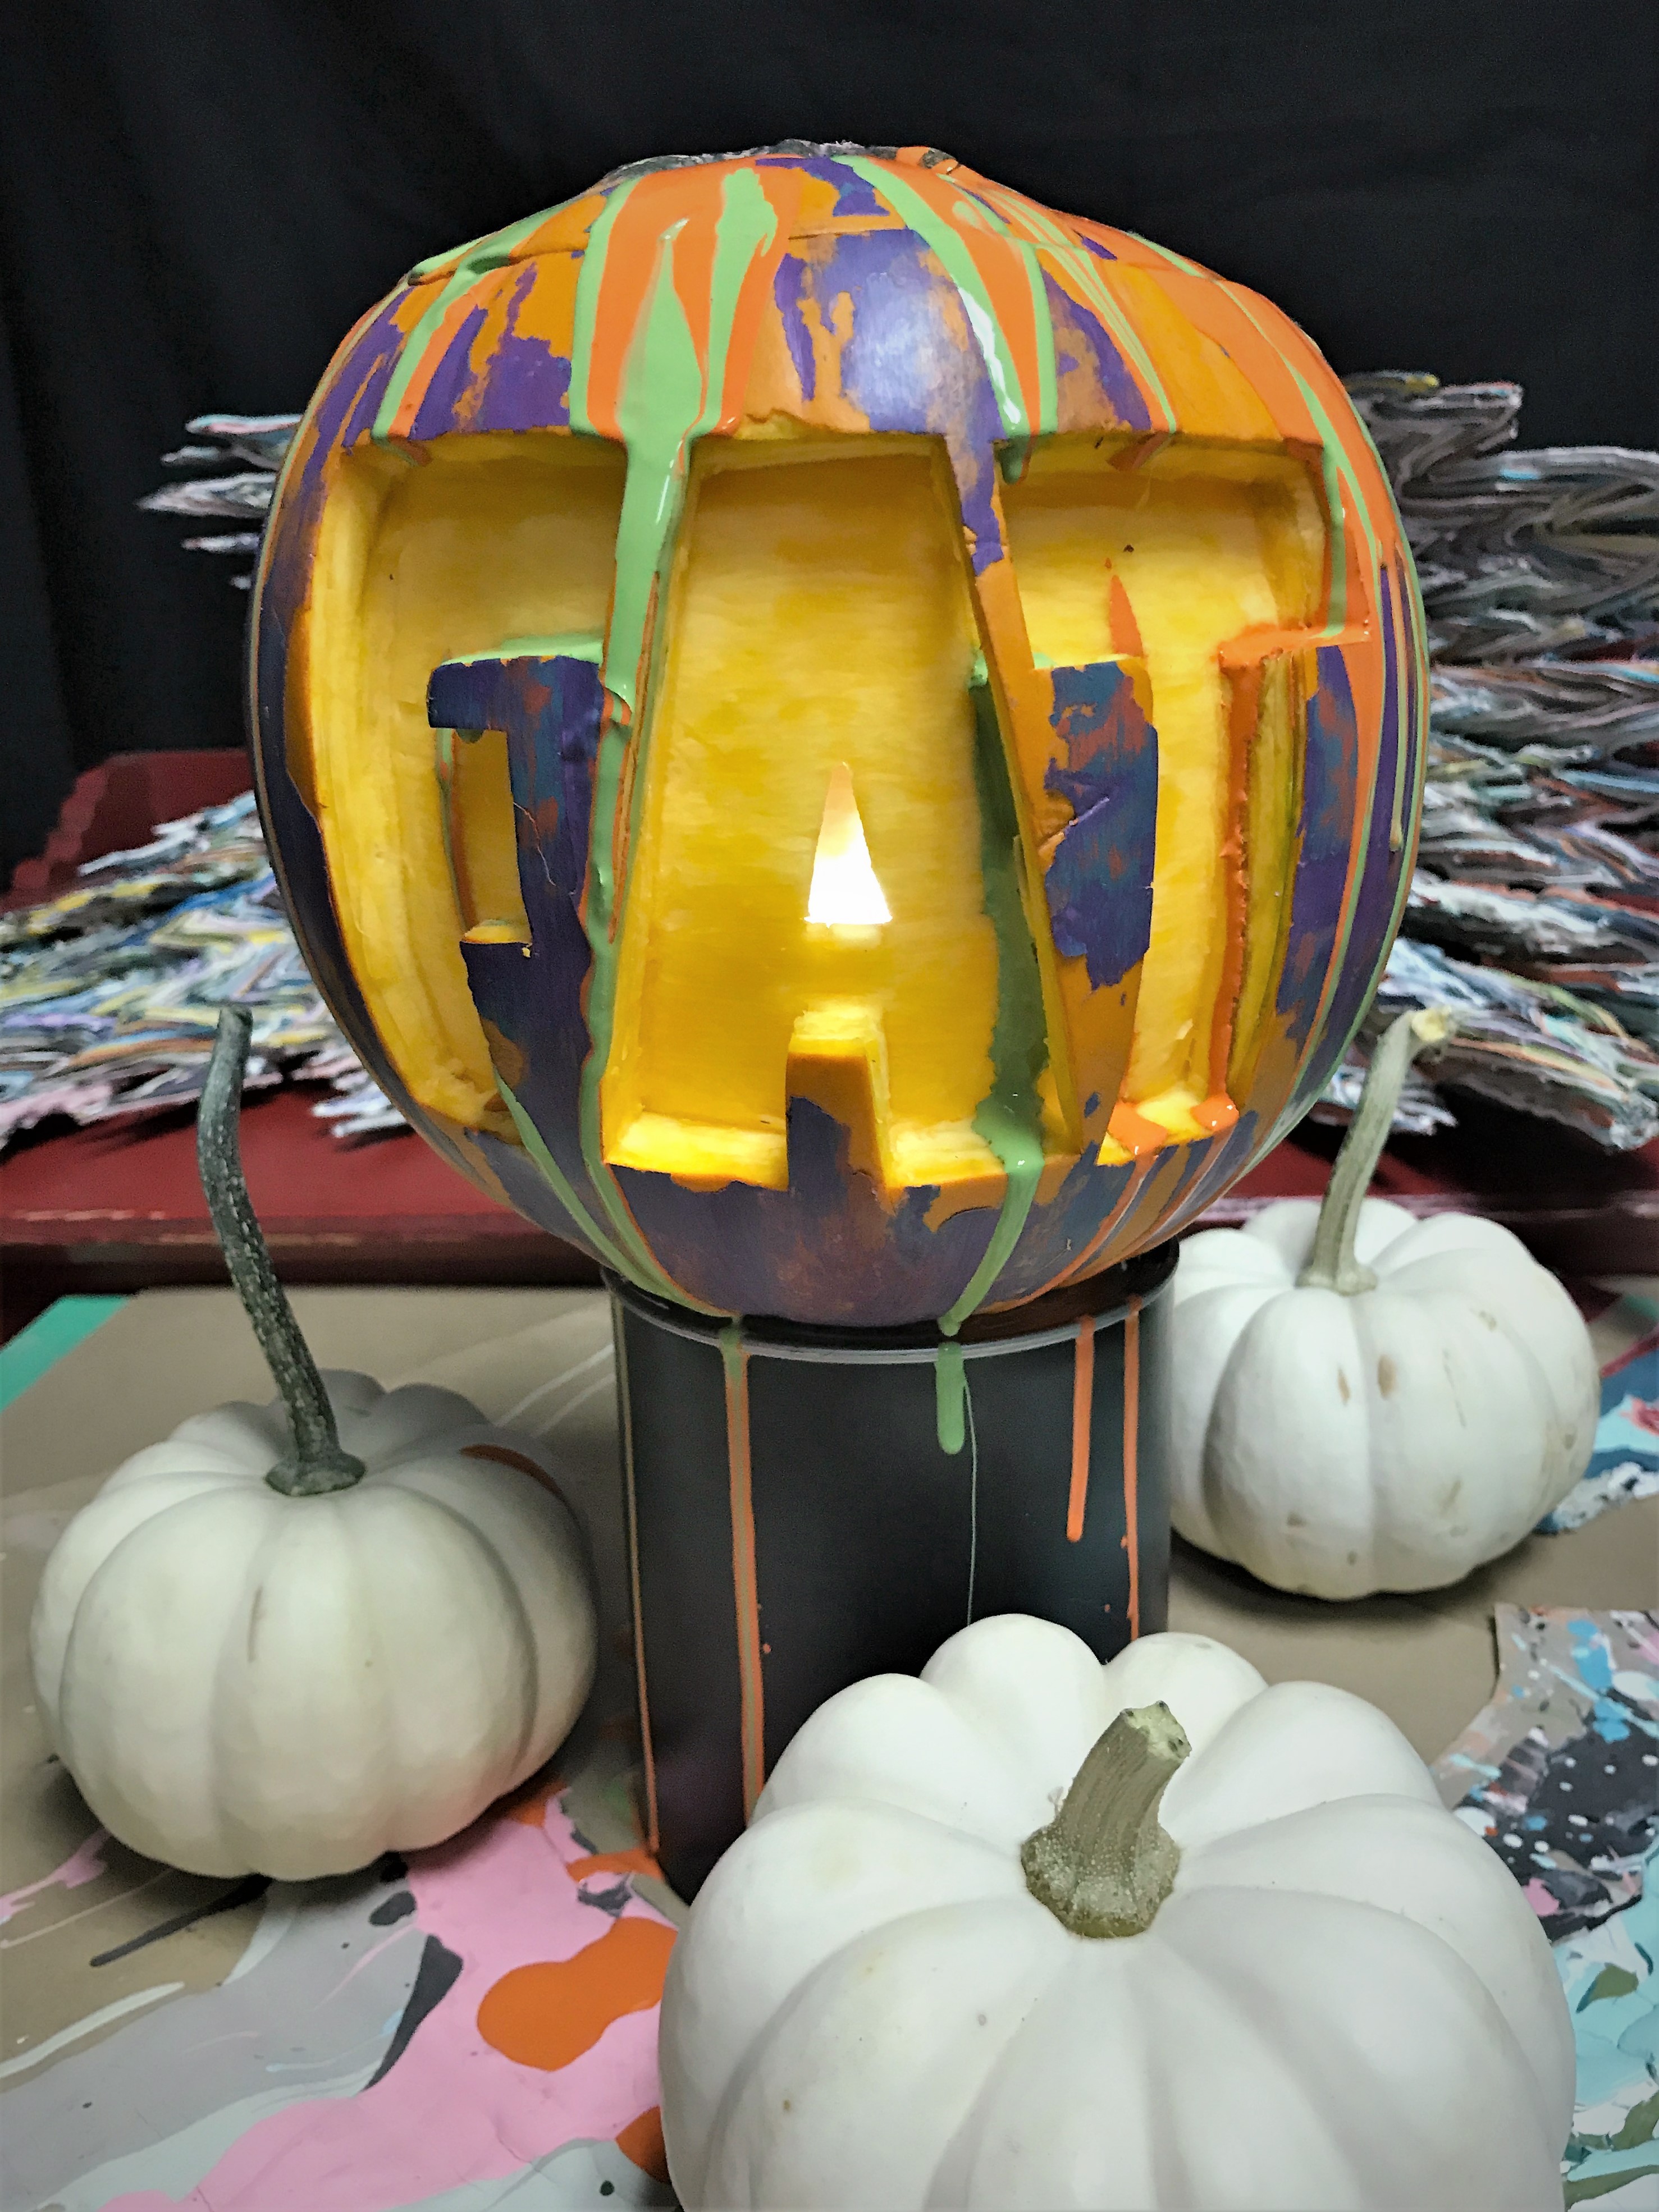
If you want to take your pumpkin one step further, carve out a funny or scary face—or whatever you want, really—and add a few drips of paint for extra dimension. Have a little fun with your creation, like we did. After all, that’s what Halloween is all about.
Get FAT everyone!


Drop us a line
You must be logged in to post a comment.
Post Comments 0